 | ||||||
270-866-2628 [email protected]
New Toll Free Phone Number 866-921-2628
Electric Sportsman
1958 17 foot Chris Craft


Left
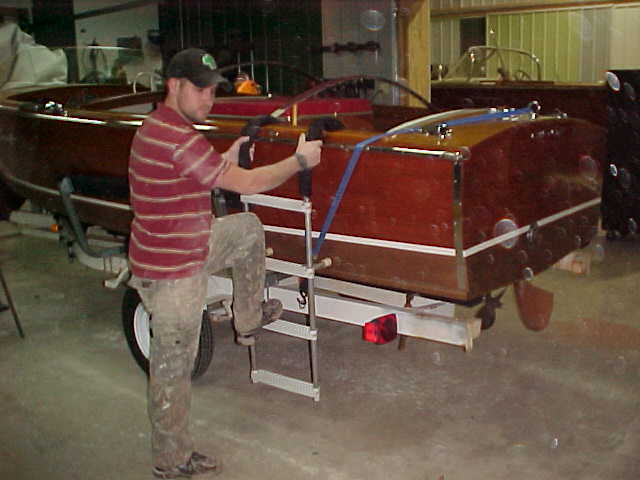
Here is the ladder style we recommend. We add padding on the "hooks" that hook it over the side of the boat as the factory padding is a little lacking. Our padding is just pipe insulation covered with a canvas sleeve.
Below
The rear seating arrangement is pictured below left. The back seat back just "hangs" on two hooks and is easily removed. The fuel tank (pointed to with the blue arrow) is going to be removed and there will be storage for the ladder behind the seat. I would also suggest storing a paddle and life jackets back there. Both of which don't normally come with boats from the previous owners.
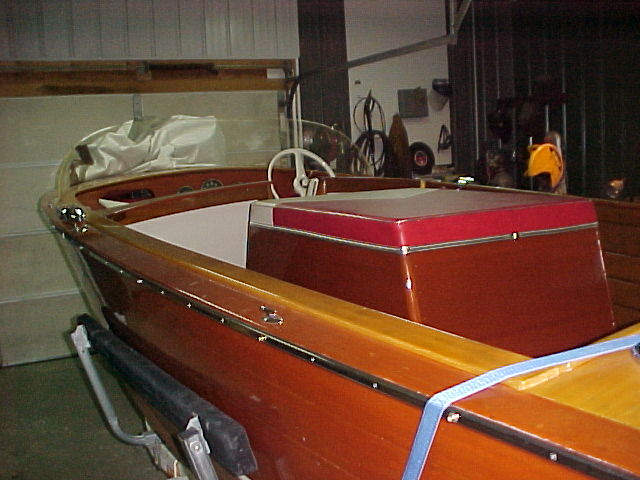
Here it is! a 1958 Chris Craft 17' Sportsman Utility. This boat has recently rebuilt gauges, and new switches on the dash, fresh re-chromed metals, fresh varnish, and fresh upholstery. All less than 5 or 6 years old.
This boat will be converted to electric power.
The cover has a "rubberized" coating that is coming off and is at or near the end of its life. I also doesn't fit properly. It is about 6" too short.
Swelling your boat
Wooden boats have to be pre-swelled before use each season unless they have any one of several versions of no soak bottoms. Why?
Wood
When wood dries out it also changes dimensions. A 6" wide plank like is on the bottoms of thousands of wooden boats may become 5-7/8" wide When two planks that are side by side dry and shrink then the plank seam opens to an eighth of an inch in this example.
So you need to soak your hull for two reasons
1 - leakage - which is really just the indicator your boat is not soaked up
2 - Most important! to swell the planks in thickness! All the fasteners on the bottom of your boat are LOOSE until the plank is swolen to its original thickness. DO NOT go out and beat your boat against the waves until this step has been taken!
Hull Construction
When planked Chis Crafts were built they were engineered for the bottom last from 4 to 8 years depending on which expert you talk to today. There was an inner layer of planking at a diagonal, or plywood, a layer of canvas (the waterproofing) and a layer of longitunal planks applied over the canvas with a product called bedding compound between the canvas and longitudnal planks. The longitunal planks really just protected the canvas waterproof layer. The plank seams DID swell shut in most cases so there was two waterproof layers. But until the planks swelled the canvas did the job.
Where did the canvas go?
The canvas may have rotted out .... if it got a chance. Normally some well meaning boatwright or owner sliced any seam compound from the seams with a razor knife or putty knive slicing the canvas to shreads. On most boats I have removed the bottoms from the canvas is still there in various stages of decomposition.
OK I am beginning to understand
why we have to soak now and some useless trivia too. How do I soak up the boat - fill the boat with water? NO!!!! NO!!!! We never, ever fill a boat up with water to swell it for the season.
How to
We will take a boat with a traditional bottom to the lake and back it in and leave it on the trailer to observe how much the boat is leaking. We may have it in 30 seconds to 30 minutes. If it is leaking so much that the onboard pump can't stay with it, we pull the boat out. We will wait awhile and put it back in or sometimes we just bring the boat back to the shop and do it again the next day. It may take two or three days. For trailer boaters, follow those procedures. If you have a boat dock with electricity and the onboard bilge pump will take care of it, just idle over to the dock, hook up your battery charger so the battery will not run down because the bilge pump is running so much. Never leave your boat unattended for the first few hours or until you are satisfied that your bilge pump and battery charger can take care of the boat. You can use your boat that day but only at idle speeds REMEMBER, the planks need to swell.
How long does it take to swell?
It could take as little as a day to as much as seven (7) days two swell completely, but you should be able to use the boat for cocktail cruises until the bilge pump operation levels off. By then, it's good to go. On your first cruise of the year, I recommend you check the bilge often, just to be sure that there is no OTHER problem lurking.
How else can I swell it?
If you cannot go to a ramp or a dock, another safe way to help swell the boat is to buy some clear plastic drop cloth material and a soaker hose. A soaker hose is one with many tiny holes that spray up. Run the hose back and forth along the bottom, drape the clear plastic over the boat and secure it to the driveway or grass using cement blocks. Turn on the hose and let it soak up that way for about 48 hours nonstop. During the daytime, the humidity will rise so high under the sun that all the boards will swell. Be careful the first time you put it in the water to make sure that it is watertight.
Are there any other tricks?
I like to hose the boat down on the inside floor and let the water run to the inside edges of the boat. A LITTLE water in the bilge - enough to start the bilge pump and check its operation before heading down to the river or lake is a good idea. Do not leave any more water in the bilge than what the bilge pump will not pump out. The fasteners that hold your planks in place are made to hold the planks with water pressure pushing the planks to the frames not away from them.
Why don't I just caulk the seams!?!?!
I have to tell a story about myself the first year or two after I got my boat at least 25 years ago! One winter day I went to the garage and noticed that the plank seams on my Capri were really wide open. I thought "what a great time to caulk the seams! They are wide open!" So I went about cutting the old caulk out (along with what was left of my canvas!) and I caulked with the best stuff I could get 3M 5200! The the caulk cured and the next spring I went to the lake. My planks expanded, the caulk did not compress very much and I BUCKLED some of my planks!
If you want o fill your plank seams use a product called slick seam.. we sell it ... and fill the seams with it. It is a wax with lots of solids in it. It is soft enough to squeeze the compound out of the seams and not damage planks. It is also durable enough to not "scour" out of the plank seams.
What if my planks seams are already caulked?!?!?!?
Then leave a sleeping dog lie... if ain't broke don't fix it.... and a number of any other statements to that effect! If the caulk is falling out then it is time to remove it and put in the slick seam. But if the caulk is at least still attached to one or the other of the two planks resulting in a plank seam then leave it alone! The bottom will seal up when it is immersed in water.
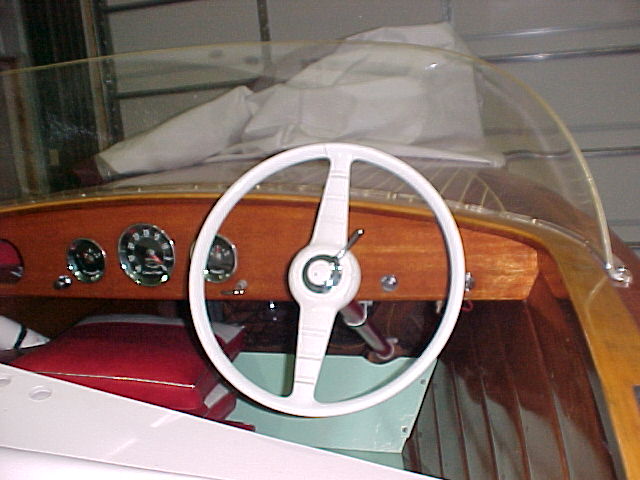
This is the original steering wheel.
If I understand correctly you'd like this traditional wheel to be left in the boat - which is what we should do. The lever in the center was the throttle which I intended to use to control your electric speed control. There is a shifter in the floor to the left of the steeering wheel that I am planning to use to control your forward and reverse switch. So this would look and drive just like it would with an internal combustion engine in it.
ParanhaMax 180 149+tax and shipping
Thru hull Transducer
$209 + tax and shipping

Eagle Cuda 300
$89.99+ tax and shipping w/ transom mount transducer
Don't yet know if a thru hull transducer can be found for this model.
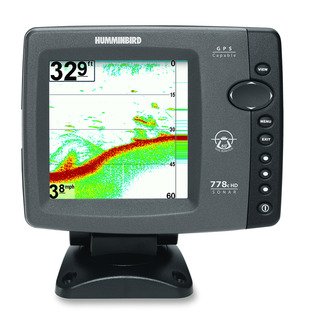
The 778c HD features a Best in Class color, ultra-high resolution 640V x 640H 5" display, DualBeamPLUS sonar with 4000 Watts PTP power output, and advanced Fishing System capabilities. In addition, it includes three programmable preset buttons to save your favorite views. Maximize your angling experience with the Humminbird 778c HD fishfinder GPS system.
price $549.99
bronze thru-hull transducer $209.99

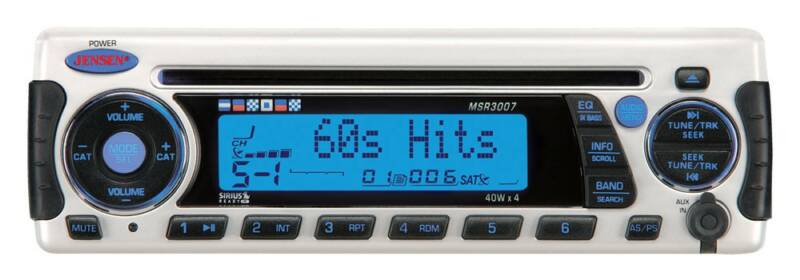

The silver-faced JENSEN Marine MSR3007 stereo is designed with the new JENSEN family styling and high tech design. This 160 watt marine stereo features a non-detachable faceplate and allows you boating enthusiasts the opportunity to enjoy the AM/FM tuner, CDs, SIRIUS Satellite Radio, and personal iPod tunes. Don't worry if you encounter rough waters, the MRH211W stereo housing is sure to keep the stereo dry. Hit the waves in style with the MSR3007RTL!
$159.99
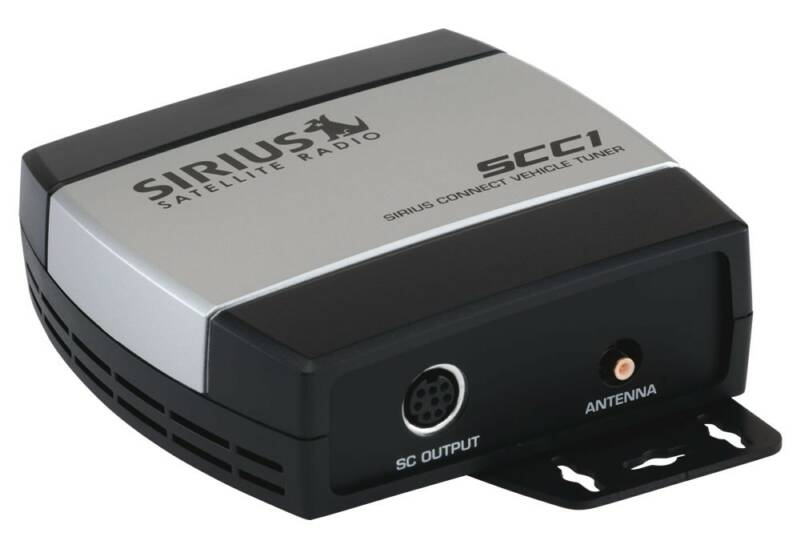
SIRIUS Satellite Gen 3.0 Radio Receiver
Compatible with the "SIRIUS Everything plus the Best of XM" package
$59.99

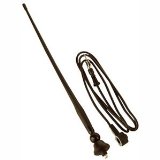
The SRA25 Digital SIRIUS Satellite Antenna sports a low profile but delivers plenty: weather, news, music, sports, and entertainment from SIRIUS Satellite Radio. The versatile SRA25 SIRIUS Satellite Antenna Kit accommodates a variety of mounting methods, with or without running its cable through the mounting surface
$64.99
Total Package $284.97 plus Installation
| ||||||
Jensen Marine Radio with Satellite Receiver and Satellite Antenna
AM/FM Antenna is still required for the radio
Speakers - Pick one set

Poly-Planar
100 watt peak power per speaker.
Polypropylene cones
6"x10"x5"
$105.99 per pair
Polk Audio
4.5-inch long-throw polymer cone driver with butyl rubber suspension
Built-in bracket allows multiple mounting options and full 90-degree rotation
Handles up to 80 watts per channel
Gold plated 5-way binding post speaker-level inputs
$165.00 per pair


Poly-Planar
100 watt peak power per speaker.
Low magnetic filed
Full Range
Bass Reflex Box Speakers
6"x10"x5"
$237.99 per pair
Boss Marine
12" Antenna
$6.99
Prospec
16-1/2" Antenna
$15.49

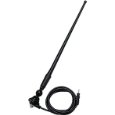
Shakespeare
39" Antenna
$79.99
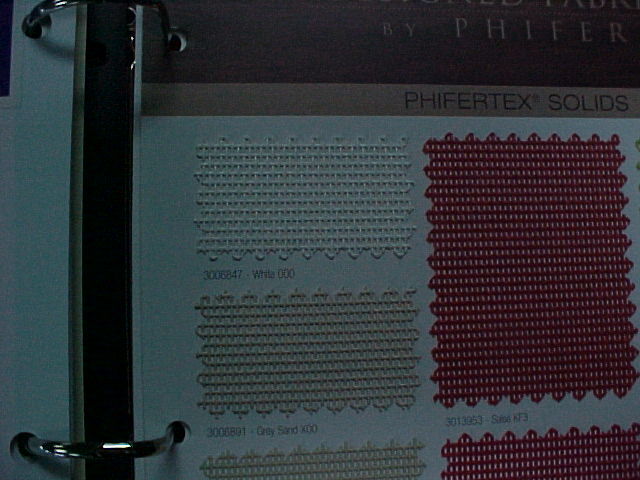
The cover.. the top will be a solid color off white to closely match the off / antique white of the upholstery.
The cover will protect the varnish finish from the sun which quickly deteriorates the finish. The top will be well ventilated to ensure good ventilation of the boat. Good ventilation helps prevent dry rot.
I'd like to protect the sides of the boat from sun as well, but was concerned about ventilation. I am planning on using a sunscreen type product that is a mesh so it will breath (good ventilation) and still protect the sides of the boat from sunlight.
If you agree, please approve the white in the samples shown to the right.

Step Pads
The step pads consist of a chrome plated frame (Arrow 1) a fluted stained (unvarnished) insert (Arrow 2) and a mounting pad (Arrow 3). The reason for the mounting pad is that the blond surround of the cockpit is not wide enough for a step pad to be mounted on top of it with out a mating mounting pad.
There is currently only one step pad assy per side, and you want two. Good choice. With the one step pad per side all entry and exit of the boat would have to be done from the front seat area..... and that still is an alternative as these things aren't cheap! I do suggest another assembly per side located near the back of the boat. (Arrow 4)
We will:
- find two used step pad frames and have them re- chromed - likely cost for pair $350 The only control over this cost we have is who / where be buy these from and will try to get these as inexpensively as we can and will pass any savings on to you.
- make two fluted mahogany inserts and two mounting pads (arrow 3) varnish 9 coats on mounting pad $125
- Install assemblies where people will step on the pad then into the back seat $25
Total cost for two more assys - approx $500 just want to make sure you want these vs entering and exiting through front seat area.
1
2
3
4
Fishfinders - Pick one
Not an option afterall... no thru hull transducer available
Recommended
Recommended 1 required for satellite
Recommended
Recommended 1 required for satellite
Electric Sportsman
Update 5/12/2011


There are several options for mounting the radio / cd player without damaging the integrety of the classic boat and reducing its value by cutting extra holes in the dash.... besides there really isn't much room in the dash for the radio to be mounted. The preferred method we usually use calls for a sculped mahogany support to be added below the dash (as seen in the upper left picture). In this small boat the mahogany ends up being a knuckle knocker if you put your hand on TOP of the gearshift lever (note the top of the lever shown just inside of the steering wheel ring) If you grasp the shift handle like a ball bat then it is not an issue. The right hand picture shows the radio mount centered under the gauges with our mount hidden and made of aluminum instead of wood. Under the dash could end up being a bit of a knee knocker as well.
The photos below show another option.... that is to take the glove box and install the radio inside the glove box. We would make a wooden plate that covers the oval opening and mount the white radio mount in the mahogany plate, then mount the plate over the dash opening. If the radio was removed it would leave some screw holes in the dash that could be filled and varnished over... in fact the original dash was upholstered with red vinyl so this option is probabaly the best and the one I recommend. Just would like your blessing.
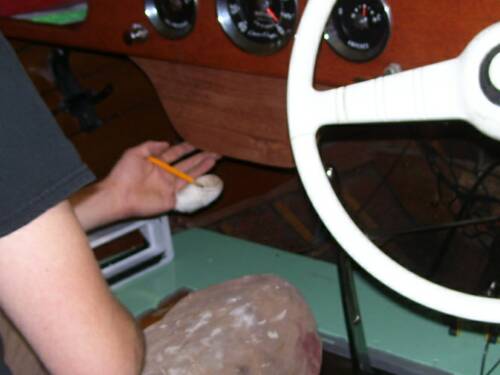


We ran in to the same space consideration / difficulty with the depth sounder. Mounted on the dash it interferes with the steering wheel and there is virtually no other place to put it on the dash. There is no room on the decks of the boat either. So we THINK we found a great solution for it as well! We mounted it to the floor just below your seat. In the left hand picture you can see the display of the instrument by just looking down through the steering wheel and between your legs. When you are not using the unit or when entering and exiting the boat it fold up to the upright position against the seat riser. Again... don't know where the heck else we could mount it ... it really is the only option... just want your blessing.
We have extended the prop shaft and mounted the motor and pulleys. We had to change the belt centers on the arrangement and have to get a different belt than was originally ordered.

Remember the step pad estimate? ( scroll up on the page and you will see where I estimated the cost for two step pads at around $500).
We found stainless step pad frames for $95 each plus shipping. They are brand new, look like chrome and are actually more durable. If we were to do the stainless frames we could cut that estimate from $500 to $375 for two pads with the wooden inserts. I have the pad frames on order in case you still want them. I can re-sell if you don't. Even at $375 they are still kind of expensive!