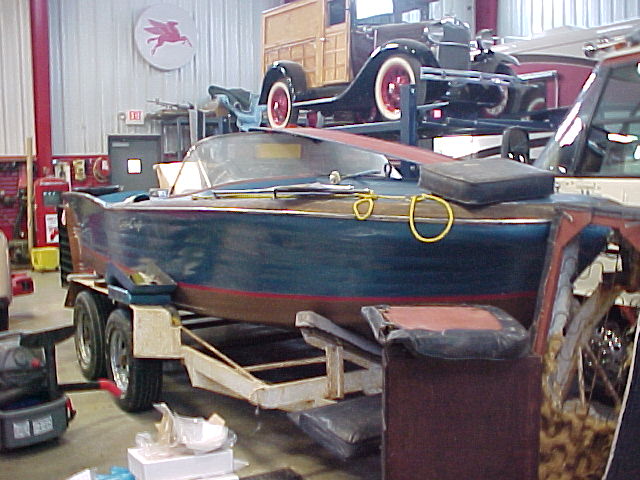
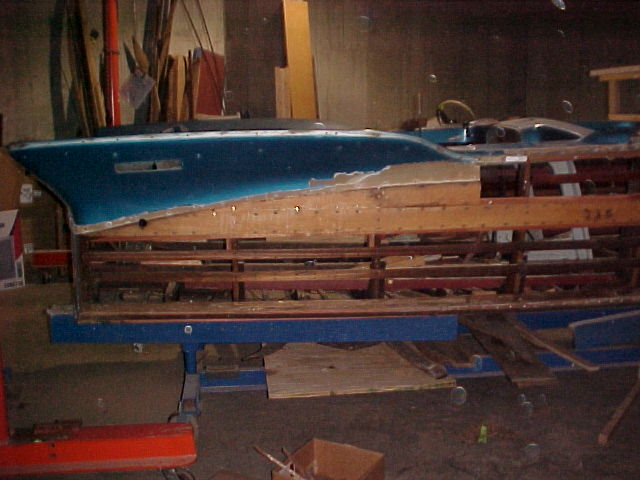
After at least 20 years in a barn the NEW owners managed to rescue this boat from its previous owner and are beginning the process of restoring this boat to better than new condition and all of its original glory !
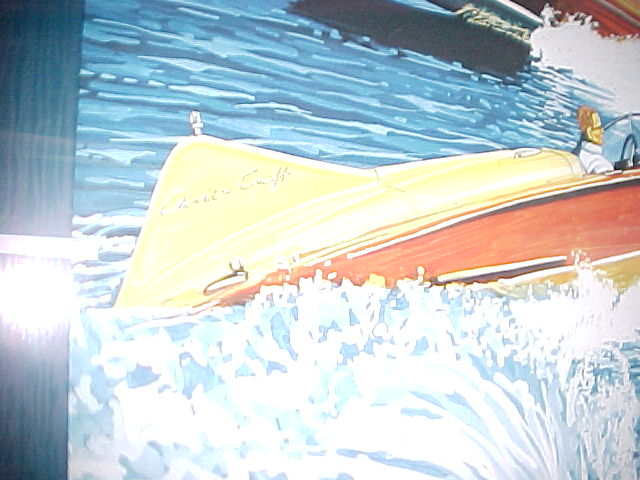
1958 Chris Craft Silver Arrow
270-866-2628 [email protected]
February 20th Update
We are currently in the research phase contacts have been made with:
- Chris Smith (grandson of Founder of Chris Craft). We want to find out how Chris Craft (the factory) dealt with the cupping of the planks on the early Silver Arrows so that we may consider their method as a possible avenue for the correction of the cupping of the planks on Hull #3.
- Dick Hickman - restorer of Chris Craft Silver Arrow, - "Murphy's Law" Dick is providing a CD of images of the restoration process on Murphy's Law and has pledged his support to discuss the information found on the images by phone. Dick had to have extensive work done on "Murphy's Law" including the upholstery, wood replacement in the hull etc. We look forward to receiving the CD of images and talking with Dick again soon. Dick wants to postpone extensive conversation until I have received and reviewed the CD of images. Even at that we have conversed for over an hour!
- Kinneys Body Shop - We have spoken with Kinneys body shop and informed him of the owners desire to utilize his services to complete the final finish on the boat. We have provided the broad timeline of winter of 2008 /2009 for the boat to be in their shop for this portion of the work.
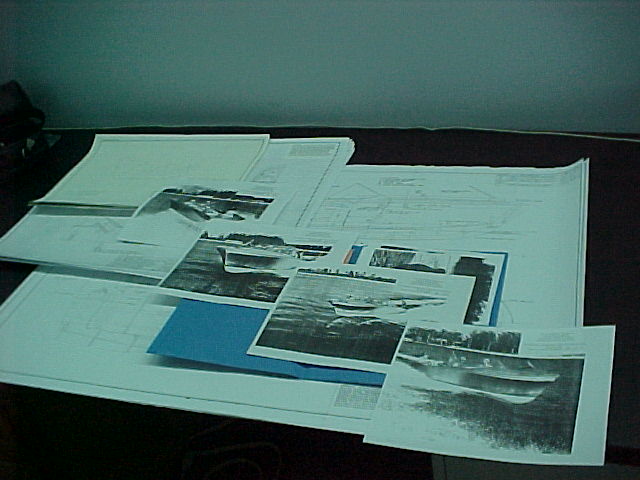
- Mariners Museum - The Mariners Museum in Newport New Virginia is working on providing a listing of information available for the Silver Arrow. Of utmost interest was determining if SA-19-003 was in fact the first production hull or not Initially the museum indicated there were only two hulls prior to Hull #3, both of those hulls being prototypes. However, I asked that this be confirmed and today it was determined the serial number sequence was indeed "re-set" for the production hulls. We now hold, as part of our investigative records, copies of the hull cards for the first five (5) hulls. The first prototype hull was shipped to Chris Craft Motor Boat Sales - 221 Park Avenue, New York, NY. The second prototype was shipped to Newport Beach, California. Production hull #1 was shipped to Charlotte NC and production hull #2 was shipped to the Algonac Lions Club (for a raffle?). Because the museum Chris Craft archives are to close February 29th and not reopen until September 2008 we have ordered copies of all the prints available for the Silver Arrow. Today, Feb 20th, we received a call from the Mariners Museum. While preparing our previous blueprint order for duplication they discovered there were more prints available. One additional print found today is of the exhaust pipe layout for the KFL engine that should confirm the odd exhaust arrangement of Hull #3. Also found to be available today are the various casting detail prints on the deck hardware. These additional prints were added to the order today. The information order is at approximately 68% of the price cap we put on the order at this time. In the packet of information we will get photocopies of any glossy photos that we may wish to order. I have the assurance of the Museum that if we order photo quality copies of these original photographs the order will be fulfilled before the archive relocation begins.
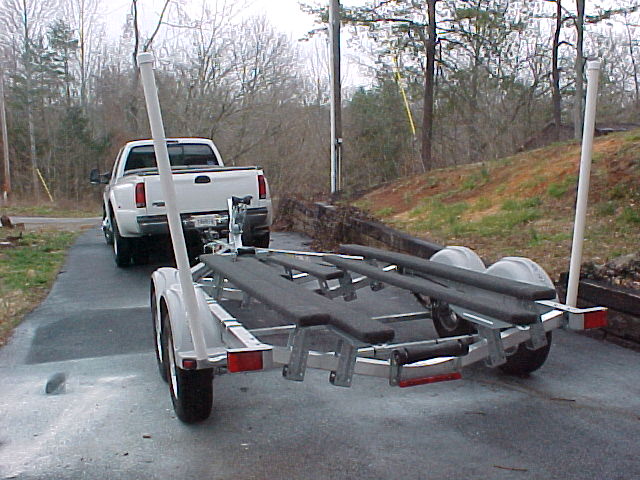
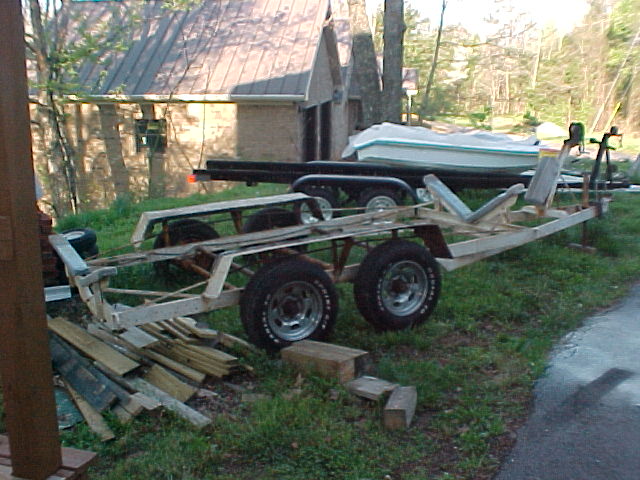
- Trailer on order - The EZLoader trailer is on order for this boat. The options of disc brakes and a spare tire and carrier were added and the options of brake washout was omitted due to not being required for the disc brakes, and also the folding tongue was omitted. The cost remains the same as the options added and omitted were close to the same price. Delivery of this trailer will be arranged with a stock delivery to other dealers and is tentatively scheduled for approximately March 15th. When the trailer arrives the Silver Arrow will be transferred to the new trailer and the bunks adjusted for it. A new "goalpost" style bow stop will also be added and the PVC loading guides will be dressed with canvas.
- Transmission consideration - As an engine rebuild/modification is being considered to increase the horsepower, we should check the transmission model and ensure the internal clutch pack will indeed transmit the extra horsepower to a larger propeller wheel (so we can take advantage of the extra horsepower). This investigation is not yet begun.
- Paint Scan - We will be getting PPG paint numbers from several sources that believe to have the proper paint number. Since we have several places where the original paint is showing we plan to scan these areas and see how the scan paint formula compares to the formula of the PPG numbers we will be getting from various other sources before a final decision on the paint is made. This investigation is not yet begun.
March 14th Update
Trailer has arrived!
April 28th Update
The boat is now sitting on its new EZLoader Aluminum Trailer and bunks are adjusted for maximum support of the hull. There was some mis-shaping of the hull due to the trailer it was stored on for so many years. Two items remain for the completion of the trailer. The "Goalpost" style bow stop must be fabricated out of aluminum and canvas sleeves must be placed over the loading guides (PVC Pipe. Aluminum for the bow stop was located today!
A full day was spent removing, disassembling, cataloging, photographing and packing chrome for re chroming as well as removing and storing the interior. Much of the disassembly process (interior, sealing panels, floor panels etc.) is required to prepare the boat to be turned over for the bottom replacement.
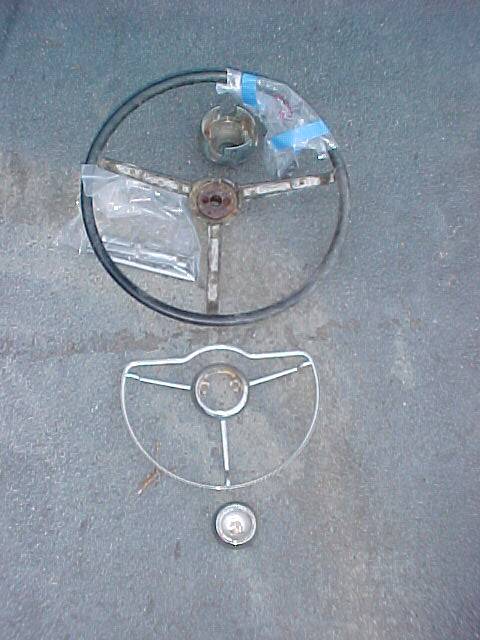
The steering wheel was disassembled and found to be in relatively good shape. The horn ring is made of pot metal and was badly pitted. The chrome shop will strip the chrome, hand solder the pits, copper plate, polish and repeat the process until the defects are removed from the substrate and plated.
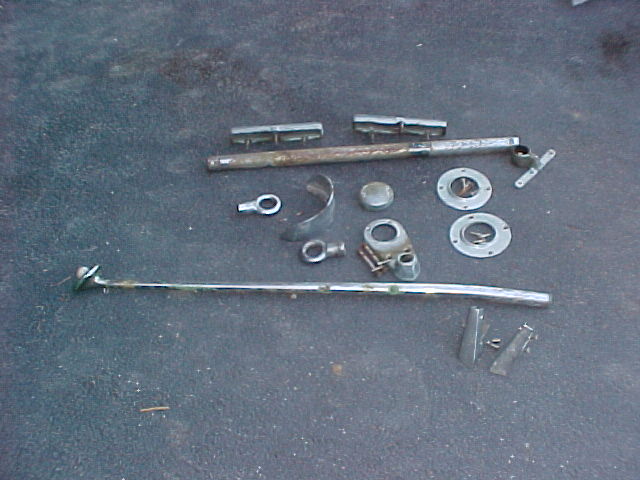
The anchor light was also disassembled. The wiring fell apart as the "teardrop" light assembly was removed from the top of the pole. It was also noted that the pole itself is bent just above the socket. The chrome plater was willing to try to straighten the pole, however the owner will have two choices on how to deal with the pole. New poles complete with new sockets, wiring, chrome etc. ready to plug in are about $1100.00 OUCH!
I suggest this pole be straightened at a machine shop where it can be set up in a lathe and a dial indicator used to find where it is bent and straighten it properly. Then the existing light assembly and pole will be re-chromed for $250.00 then required, making the total cost to refurbish the pole in the order of $350 plus Machine Shop charges. Of course the owner has his own machine shop!
These vents were removed after removing the sealing panels in the boat had to be removed for access.
The vents had to be disassembled also as the frames are chrome plated bronze but the inserts are stainless steel! These inserts were held in by small pieces of brass that were soldered in place to keep the stainless panels captive.
The rest of the plating work is pretty standard stuff.
September 7th Update

September 13th Update
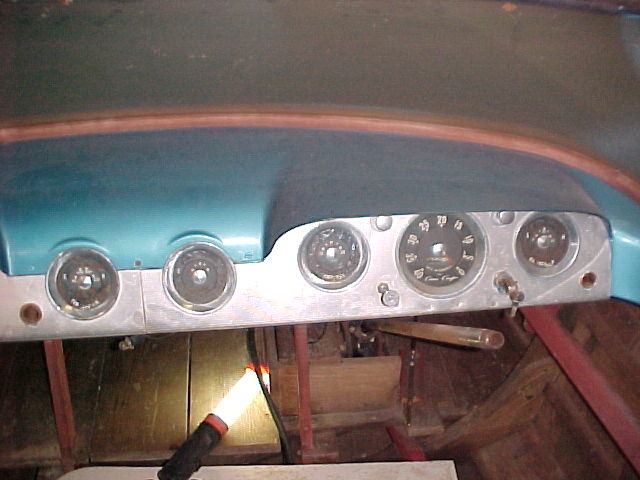
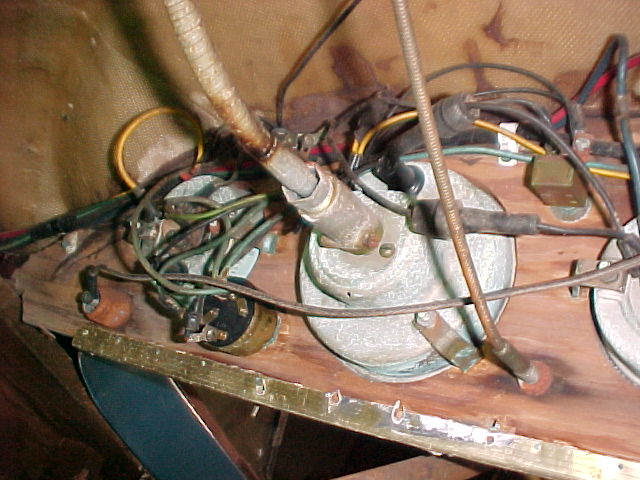

Wiring record. - All wires are marked as hot, ground, sender, and so forth as well as recorded in this photo. The gauges have been sent to the industries most experienced restorer and are due back in December. Note the gold anodized finish on the dash. This original finish no longer shows on the front of the dash. Early anodizing did not hold up well at all.


After a bit of aggravation concerning obtaining materials for the custom bow stop to be made of Aluminum, a solution was found. The photos above are renderings of the bow stop design. The photo on the left shows the stop from the side of the approach of the boat as it enters the trailer. 2"X12" X 24" long treated lumber covered in bunk carpeting will be installed vertically on the arms on each side of the post, thus making up what is sometimes referred to as a "goalpost" style bow stop.
The right hand view is from the tongue of the trailer. The angled mount on top is for the winch so that it will be above the boat and able to attach to the bow lifting ring.
The file posted below the pictures is an AutoCAD drawing of the bow stop and winch mount.
This unit is on order and to be completed by Oct. 1. This unit will complete the trailer order and has already been paid for.
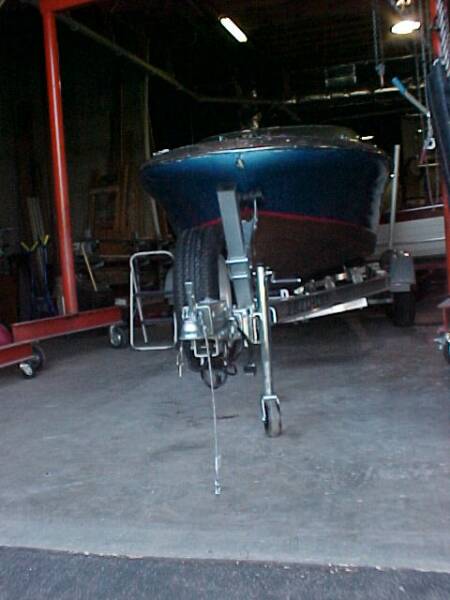
January 21st 2009 Update
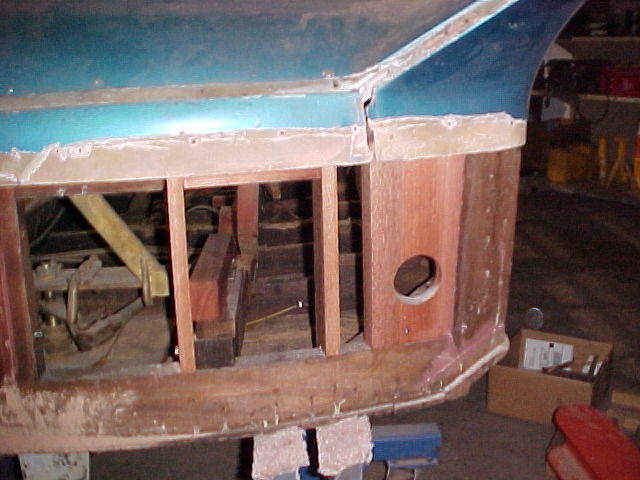
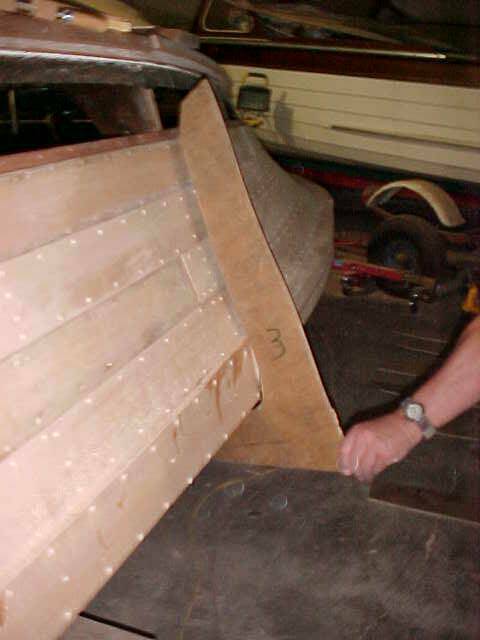
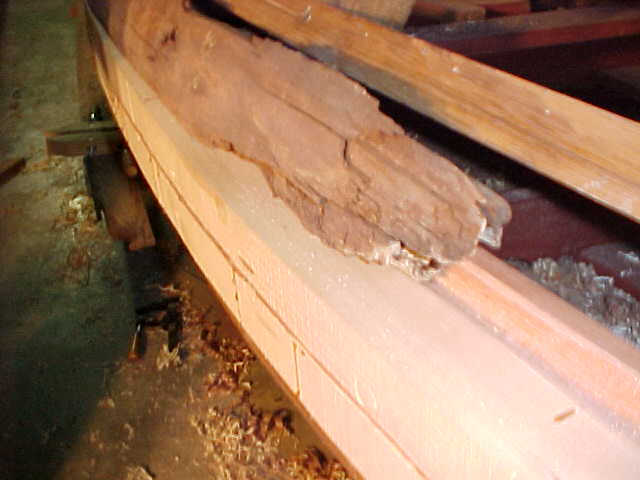
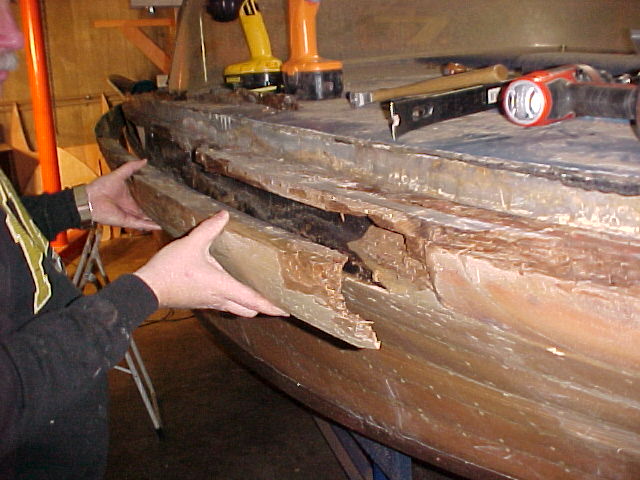
Upon removal of the fiberglass on the side planking we found numerous repairs made to the planking that had been hidden below the fiberglass. Most notable was on the port side where the top planks had been patched with what appears to have been a water based putty. Most of the planks and structure had been rotted away. In fact a portion of the structure had been replaced in the past! The original structure was Spruce and had been partially replaced with White Oak.
A pattern has been made of the original structure before it was crumbled away. The deck fiberglass deck has been cut away from the structure and is ready to remove so the structural members can be replaced.
On the starboard side we found more of the same types of issues at the bow. The structural members had never been replaced on this side though and it appears some type of insect has eaten away part of one of the structural members. Note area above planks just below the fiberglass deck level.
The planks measure .41" thickness which is about 1/32 shy of the original thickness. The factory literature indicates the planks were to be 7/16" thick or .4375". Discussions with Christopher Smith, grandson of the founder of Chris Craft tell us a couple of things.
- various components of the boats were dried to a specific moisture content prior to assembly.
- Planking was dried to lower than the equilibrium moisture so that after assembly when the wood equilibrated with the moisture in the air any remaining plank seams would close tightly.
We will be adding moisture to these planks to determine if they well the extra .020" to the original dimension.
Other things learned from Christopher Smith include:
- The cupping of the planks was a serious problem on this boat. In fact the warranty solution to remove the cupping was to remove the fiberglass and fair the planks (sand to flatten the planks) and then replace the fiberglass, gel coat, fair, and repaint. In addition, sealer was applied to the back side of the planks.
We have determined that the factory "fix" was not applied to this boat. We noted:
- there is no indications of a sealer being applied to the back side of the planks
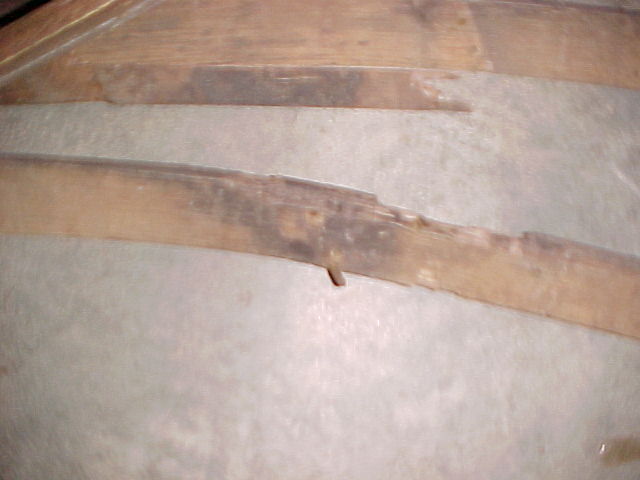
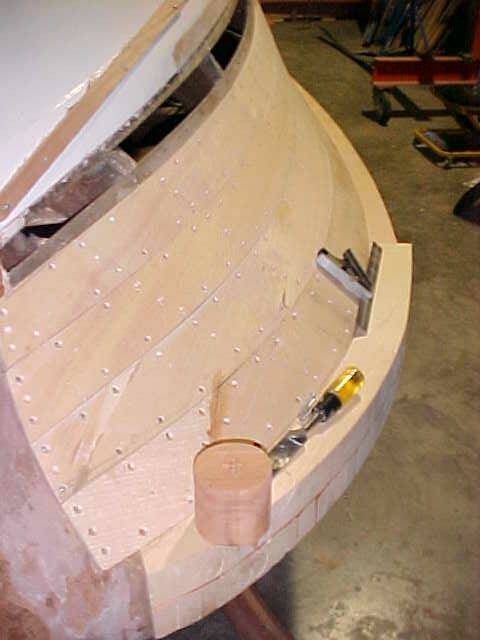
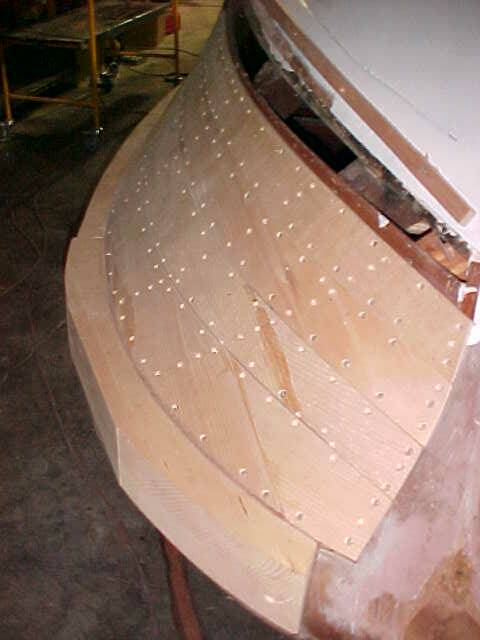
- until a straight edge is applied to the back side of the planks these planks do not appear to be cupped but rather thick in the center. They are in fact cupped and the cupping can be seen on the face of the plank (outside of the boat) as well as on the inside with the help of a straight edge. The plank measures .41" at the edges and also in the center of the plank. If the planks had been faired at the factory as a warranty fix the thickness measurement at the center of the planks would measure less than measurement at the edges.
- As the pictures scroll you can see the "daylight" between the straight edge and the middle of the plank. This space measures .019" (less than 1/64th")
Refastening:
We found that each of the plank screws can be tightened any where from 1/4 turn to 1/2 turn, and since there was no indication of sealing of the back sides of the planks we are going to do a quick removal of each of the planks, inspect for rot, seal and reinstall the planks that are in good condition. There are a few planks that require duplication due to either rot, extreme cupping, cracking, damage when fiberglass was removed or a combination there of.
There is localized rot in 3 separate areas of the stem. These will be "treated" by removal of infected wood and additional wood surrounding it. Treatment of all remaining wood with Smiths Clear Penetrating Epoxy Sealer (CPES)
February 11th 2009 Update!
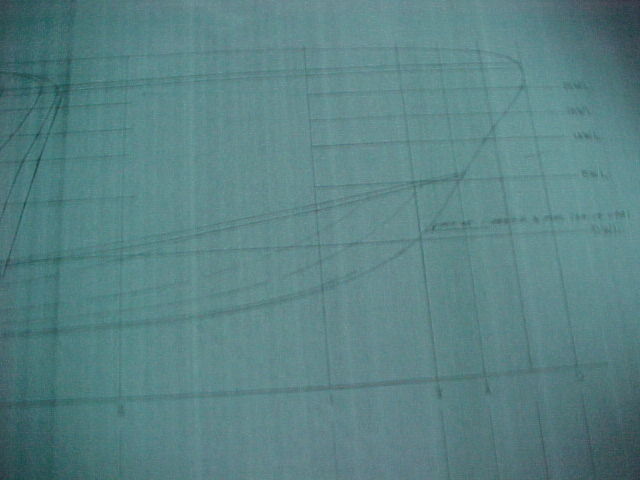
First, take a look at the Chris Craft print above. It is very hard to read, but the frames are numbered on the print. I have added some text so the frame numbers are legible. The frame stations are numbered by Chris Craft starting with 0 at the bow, then the first frame station is numbered 1/4, the next station 1/2, then "normal" numbering 1, 2, and so forth. We will be referring to frame stations where we have had to replace or sister frame these frames at certain locations.
1/2
1/4
1
2

Port side frame station 1/4. This is the first frame from the bow on the port side. This frame was cracked at the bottom - possibly when the boat was built. It was also cracked where each of the plank fasteners attached planks to the frame. This frame was replaced in its entirety.
Port side frame stations 5 and 6. These two frames were cracked by the penetration of the original plank fasteners. We have sister framed these two ribs and glued the original frames together to make them usable again without the need for replacement.
Starboard side frame station 1/2 which is the second frame from the bow - sister framed
Starboard side frame stations 2 and 4 sister framed
2
4
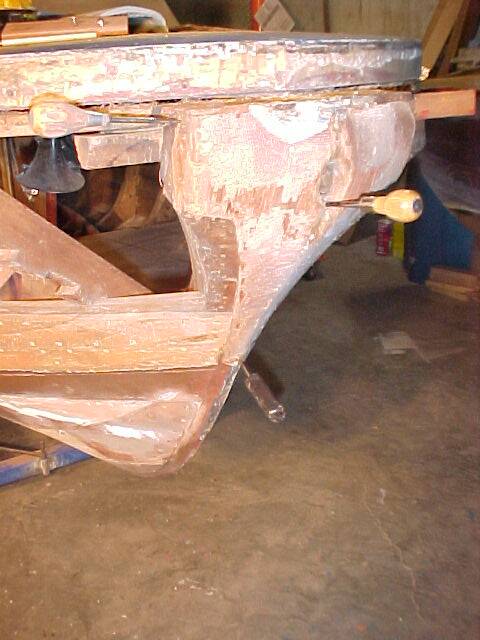
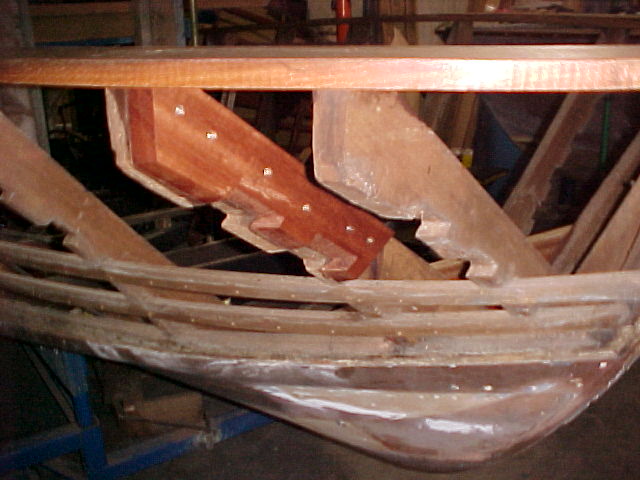
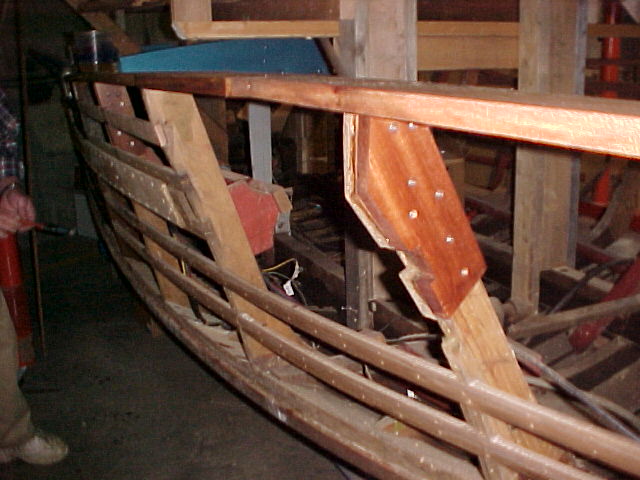
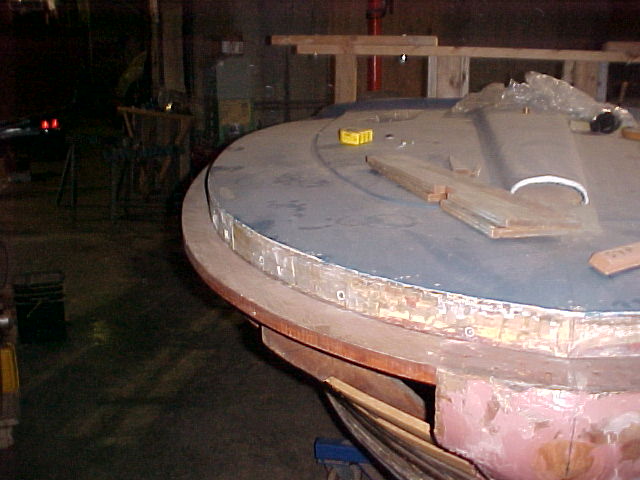
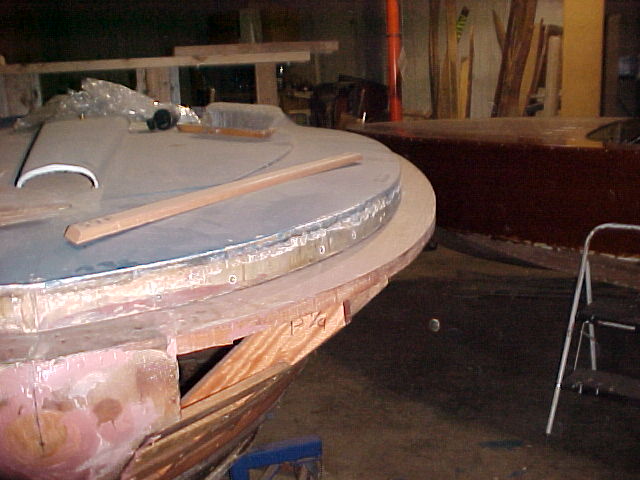
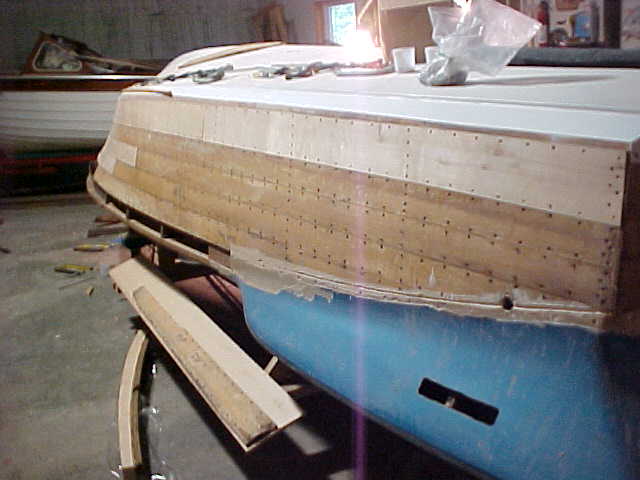
The port "covering board" makes its transition from rotted and fractured spruce to new Philippine mahogany. This new frame will be essentially the same weight and much stronger and rot resistant....better'n factory!
"Covering Board" is the term being used for this part, as if it were not covered with fiberglass parts this would be the covering board. It could also be considered as being the Sheer Clamp board. As a matter of fact we did call it Sheer Clamp in the invoicing. Both the Port and Starboard covering boards have been replaced in two pieces and extend back under the back half of the fiberglass deck.....still in place..... for today....
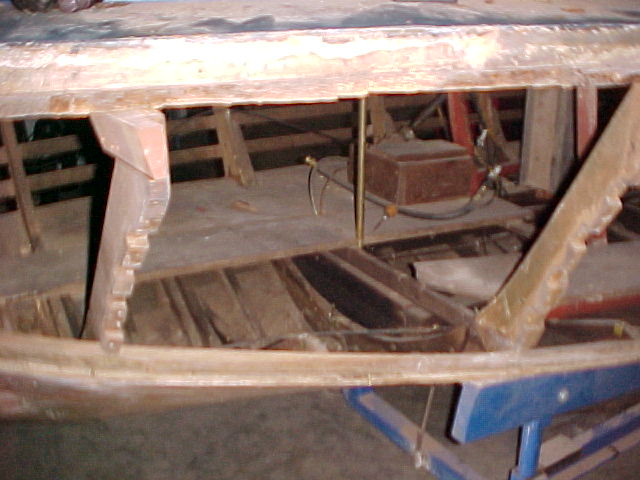
The back half of the deck will be coming off to gain access to replace the transom.
Right -
Fiberglass top front half - removed
Below
Removing planked flooring - we are told this is not original to the boat. However, it is being saved in case the customer wishes to re-install it.
Right
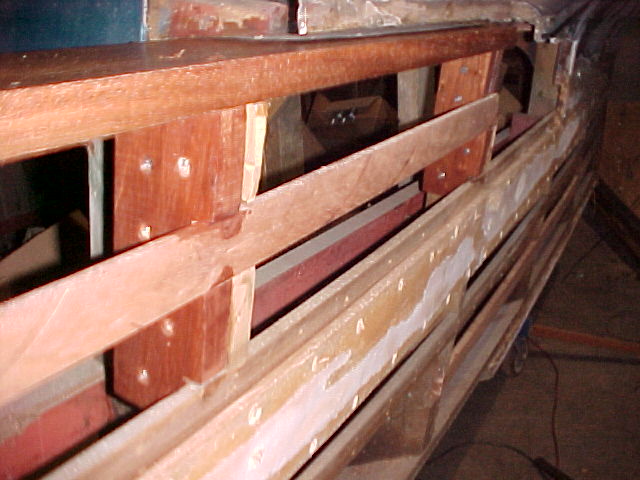
Old Battens - showing rot and splitting. These battens, the top two rows of battens are made of white oak and the new ones will have to be steamed to match the curves.
Below
New white oak battens ready to be steamed and installed. Also mahogany battens that will be installed where the curvature is less severe. We will be replacing battens with White Oak where Chris Craft used White Oak, and use Mahogany where they used Mahogany.

Gusset at Frame station 1/2 that had been chewed by animals - replaced.
March 12th 2009 Update!
The top has been replace on the new covering boards. Under the top structure an original wood strip that runs the perimeter of the fiberglass top was replaced for the screws from the bottom of the covering boars to fasten to.

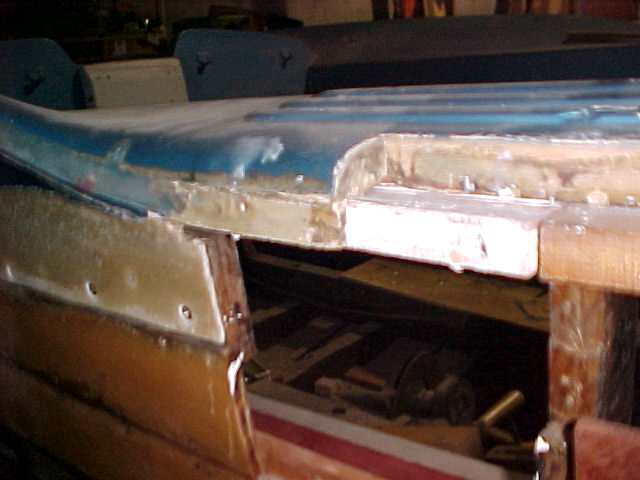
The frames that attach the back 1/2 of the fiberglass deck to the frames were rotted on the ends. These frames were made of 3 thin layers of mahogany because the both twist and bend into the fins. These sections of frames were replaced from point 1 to approximately point 2 in the left photo.
1
2
The transom had to be replaced due to rot. We tried to avoid removing the back 1/2 of the fiberglass top but the transom was bonded to the inside of the fiberglass. Notice how the transom plywood.. oh.. by the way this was about the largest piece of transom saved... is rabbeted to accept the fiberglass and make it flush with the transom below it.
We also replaced rotted exhaust supports, fuel tank supports and vertical frame members that had been chewed by the animals nesting in the boat for so many years. Also note that all screw holes in the frames were filled with dowels glued in to them so pockets of water that would develop and accelerate rot were filled thus eliminating this possibility.
Interestingly, as the pictures above illustrate ...... when the fiberglass was off the curve of the frames appear to be the same as the Cobra! We didn't see it until the fiberglass was removed and unfortunately deleted the picture from the camera before we got it on the web. But, if you imagine the Silver Arrow without the fins in place..... This is a question for Chris Smith! Did they take a Cobra Design change the materials and add a different fin arrangement?
The New battens have been steamed in place on both sides of the boat. The starboard side got two new white oak battens in front and some mahogany battens down the farther. On the Port side we replaced the top two white oak battens with white oak and the lower two mahogany battens with the same.

April 27th 2009 Update!

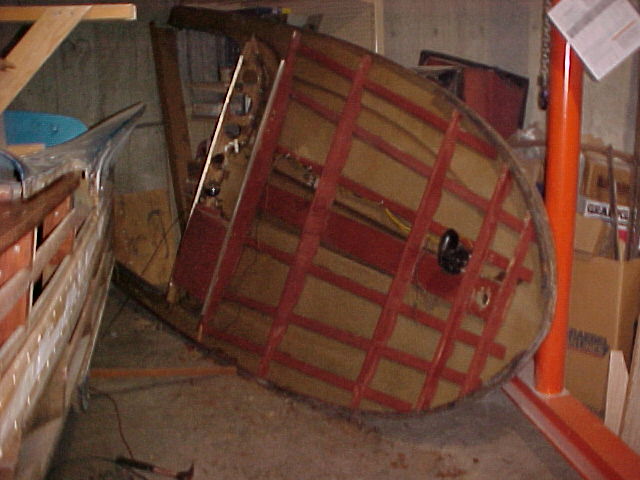
Here is how the bottom comes off! We remove screws by core drilling around them down to the plywood level, then remove the screws much more easily than if we had unplugged the holes and scraped the filler out of the screw heads, then tried to back them out. Note all the small strips running cross ways on the half laying down flat on the floor. These are called intermediate ribs. The outer plank is pulled tight against the plywood at the ribs and once again by the intermediate ribs. The brightly colored intermediate ribs are the new ones cut and ready for placement once the new plywood is permanently installed. Once all of the new intermediate ribs were produced from white oak (like original) the old ones were split off the fasteners, the fasteners removed and then the plywood and outer planking were separated for outer plank duplication.


All of the intermediate ribs are numbered for placement between the ribs (or frame stations) There were more frame stations than what were indicated on the original prints! Go figure!

The boat was rolled outside on its dolly and the frames soaked down with a citrus degreaser, then pressure washed with hot water. The process revealed one split frame - which we sister framed. During the inspection in which the cracked rib was found we also found where some ribs were split by the installation of the plank screws at the factory. We sistered those frames as well - see below.


All plank screw holes in the frames, chines and keel were plugged to prevent water pocketing in the old holes. If water were allowed to collect there it would make a great environment for the proliferation of mold / rot! There were approximately 2500 holes.
We found a bit more rot in the stem but it was easily repaired...... easy when compared to replacing the stem.
The rudder support bracket bolts were rusted out and in fact the bracket itself had quite a bit of rust on it, so we removed that assembly and painted it and installed new bolts in it. The paint is Rustoleum Cold galvanizing compound.


The fuel tank mounting straps were badly rusted so we wire brushed the rust off and treated with cold galvanizing compound.

The boat was laser leveled and approximately 1/4" of twist was taken out of the boat prior to the installation of the plywood inner layer and the longitudinal planks. Note the laser line on the tape measure at approximately 10" off the bottom of the engine stringer. We measure from side to side to ensure the boat sits perfectly level on its cradle. Then we drill holes in the concrete and pit the cradle to the exact spot where the boat was leveled. The boat can't creep to an unlevel area of the shop, and if we ever have to move the boat we can put it back in exactly the same level spot and not have to take the time to re-level.
We have already cut the inner layer of plywood for the inner layer and also trial fit the Garboard plank on both sides of the boat. I'm happy to say we are over 1/2 done with the bottom.
May 20th 2009 Update!


All bottom planks are trial fit. The fender washers are to prevent cracking of the planks and pull through of the fasteners when the planks were steamed into place. The C clamps are on the new outer section of chine. The chine is two piece, one internal and one external. The external chine had to be replaced as it was cracked about 2 feet back from the bow on both sides and weren't reusable. We found ourselves wondering if the originals were actually steamed in place as the new ones were. We think not as we had no problems with cracking.
This outer chine section is sculpted on the boat. The chine sections started off as 1-1/2" thick planks sawn to match the rounded contour of the original chine and planks. Each piece was steamed for approximately one hour and then clamped in to place. After that the angles are faired into the new chines to the final contour as pictured below.
We believe this type of chine construction is unique to this boat as we have not seen it so far on a number of Sportsmen, Capris, Ski Boats, Super Sports, Holidays, Continentals, and even Centurys and took hour$ to fabricate. There is nothing really difficult about these - except for they have to shaped by hand. We used a hand held power planer to get the rough shape and then finished the shaping with hand planes.
If you have never liked using planes and or chisels take a look the sharpener we use and because it is so good we sell it too!
Planes are now a JOY to use and save countless hours of sanding. They also work where literally nothing else will!


It takes a full man day to drill and countersink the thousands of holes in the planks and the outer chine section! Holes are for joints at ribs, intermediate ribs, garboard plank to keel and outer plank to inner chines, and outer chine to inner chine connections!
The next step is to remove all this wood that has been fit to the boat, apply 2 coats of CPES to the bottoms and sides of all surfaces and install each plank with proximately 2 tubes of 5200 per plank. Smaller planks will take lesser amounts, but on the average this estimate is correct.
After that, the hull will be kept soaked for 3 days by wetting down and covering with a very light (clinging) plastic drop cloth. The soaking will do two things - expand the planking both in width and in thickness. This expansion removes any air trapped between layers improving the 5200 bond. It also brings the planks to a mid point in moisture content - not as dry as when the boat will be in winter storage and not as wet as when the boat sits in the water for extended periods of time.


July 20th 2009 Update!
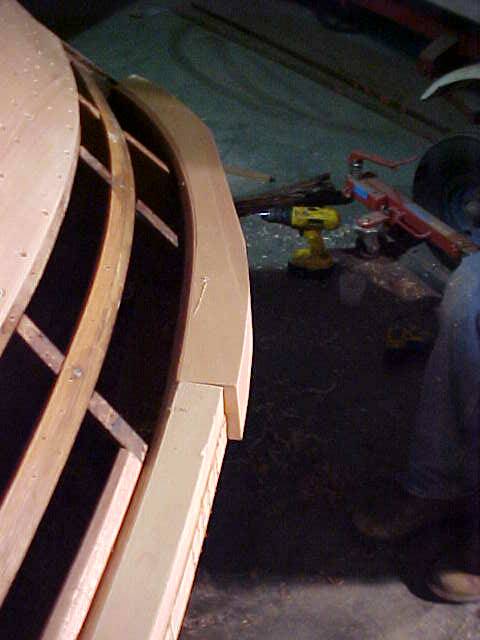

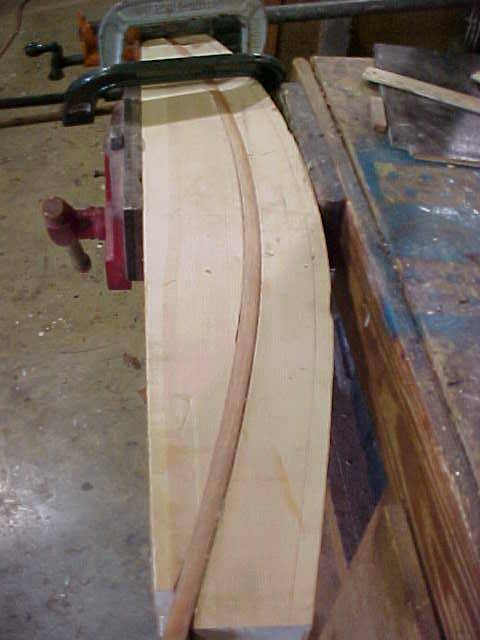

Remember these planks? Pictured above are the first and second plank back from the bow - top strake. These planks are really not planks so much a they are sculptures. We start by laminating two thicknesses of spruce together and cutting out the rough shape with a band saw. This was done for the both the first and second planks back from the bow.
For the first plank - next to the stem we steam and then laminate a 1/2" (.480" actually) layer of mahogany behind the spruce blank we have made for the sculptured plank.
After checking the blanks for fit against the frames we then cut a bevel in the plank to accept the edge of the 2nd row (next) row of planks - strake #2. This bevel is cut by hand with a low angle hand plane. It has to be cut by hand as the blank is tapered from one end to the other.
Blanks are in place and ready to be sculpted to the proper contours!
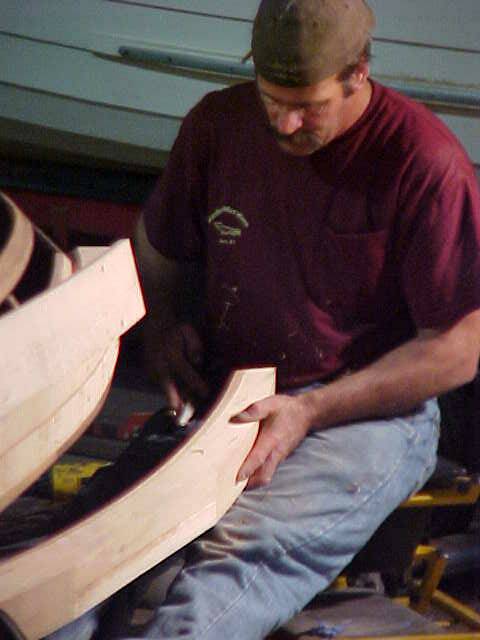
Next comes the scary part!!!!!!! Sculpting the shapes.... can carve too much!!!
Pictured above are almost l the new planks on the Starboard side!
Here is the stack of contour gauges that will be used tomorrow to shape the planks. Each is numbered with a station (frame) number and the plank will have that contour at the respective station number.
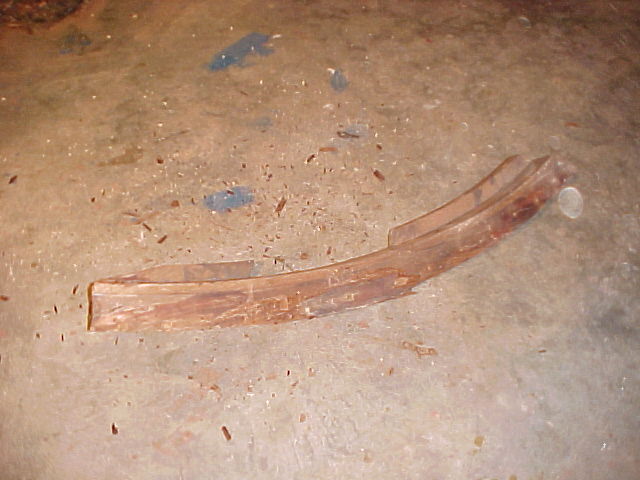
As you can see from the original plank over the planks... there was no re-using these!

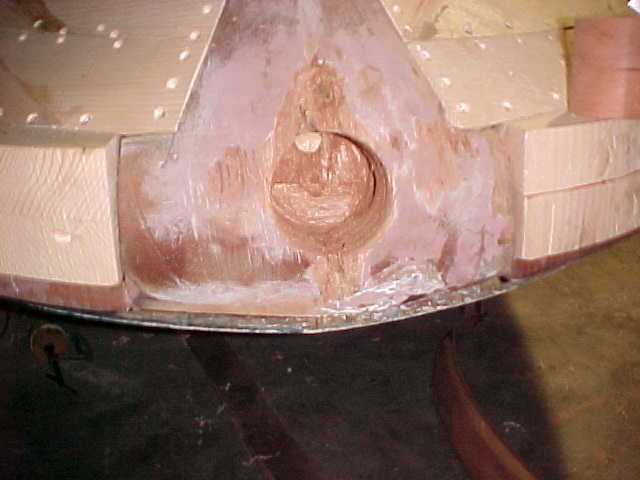
Additional rot found in Stem behind an area of good wood. We started digging when the plank above was fastened and we found fasteners wouldn't catch.
New Toll Free Phone Number 866-921-2628
March 15 2010 Update!
Mariners Museum Information has arrived!