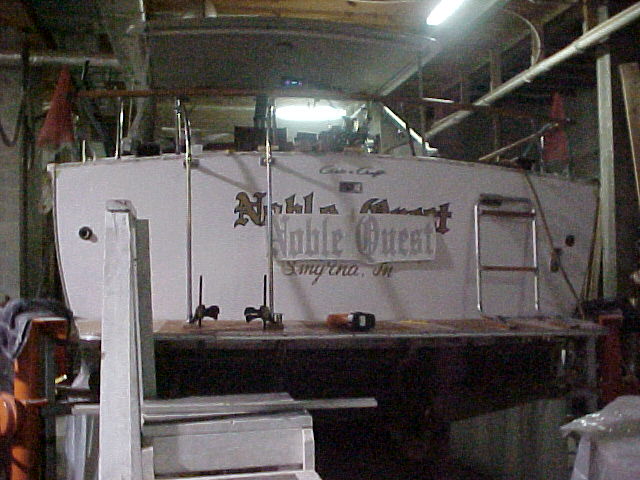
1968 Chris Craft Cavalier Futura 33'


Shown is a little rotted plywood decking under where the windshield and deck meet on the starboard side.
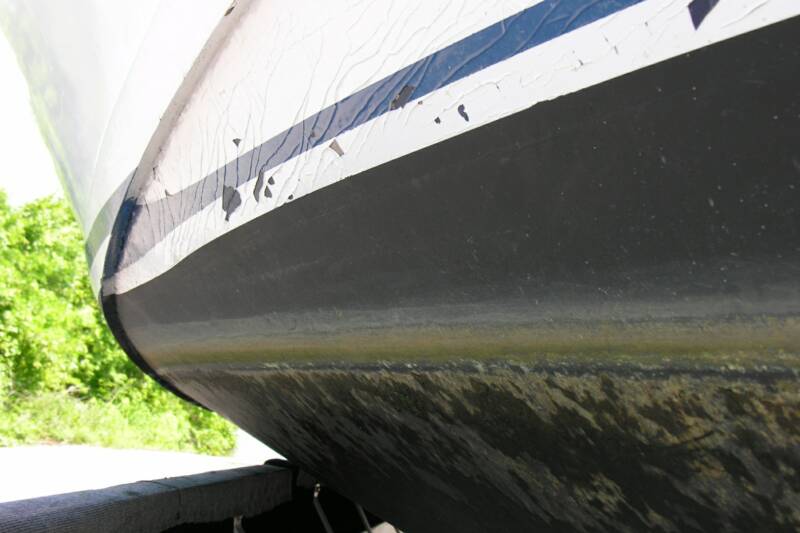
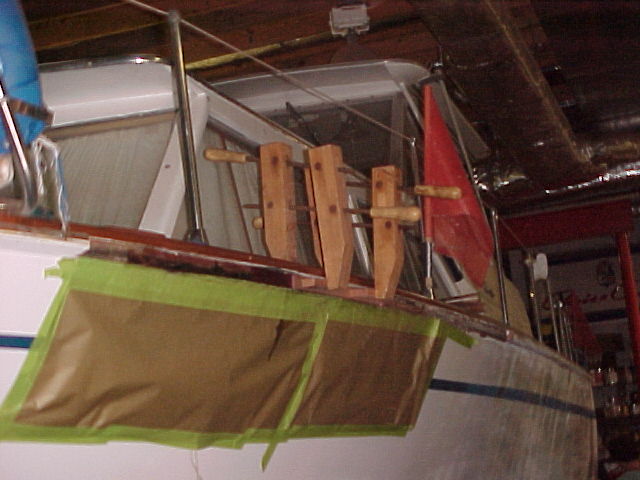
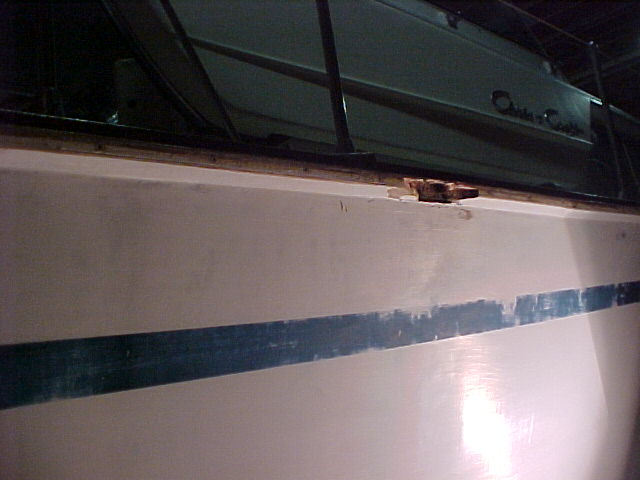
Some checking of the paint is evident under the spray rail. The marine surveyor did not indicate that this area was high in moisture, so it is suspected that a "hard" paint such as an automotive paint might have been used on a previous restoration and has cracked as the boat flexed while underway.
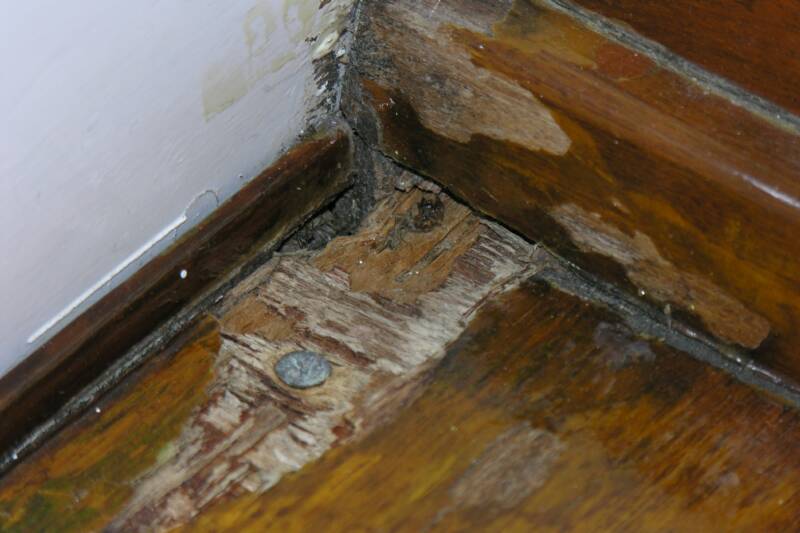
Shown here are two spots where water has infiltrated and caused rot in the rub rail and top few inches of the plywood hull. The spots appear to be in the plywood only and have not progressed to any structural members beneath the surface.
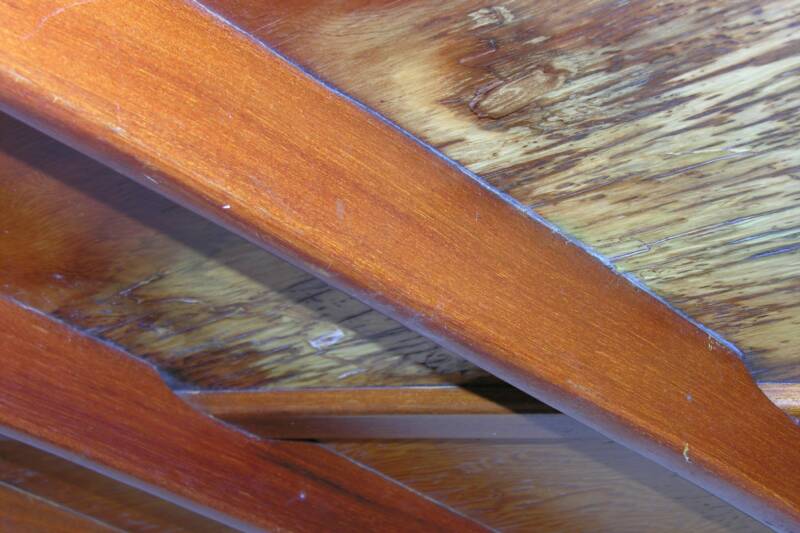
Pictured is the corner of the top of an entertainment area within the cockpit. This area houses a refrigerator. This top will be removed, and the rotted Philippine mahogany cut off the edge and new Philippine mahogany joined to the edge. The top will be re-attached and the customer will be staining and varnishing this top.
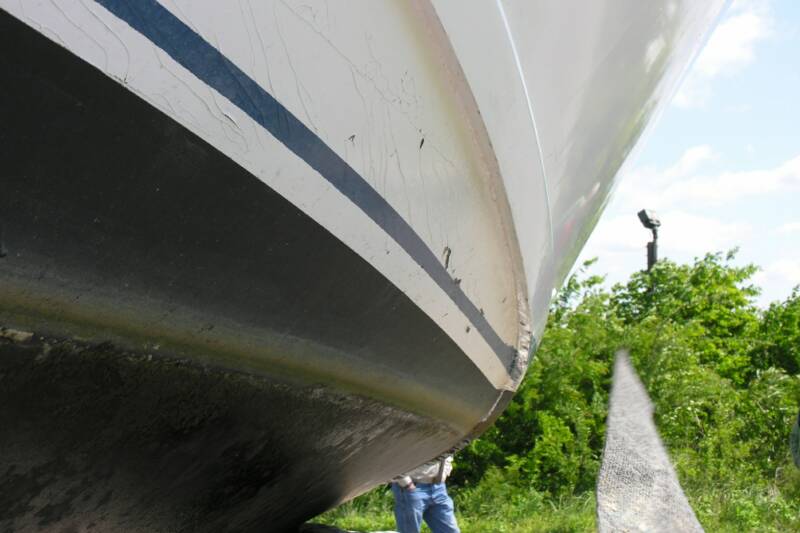
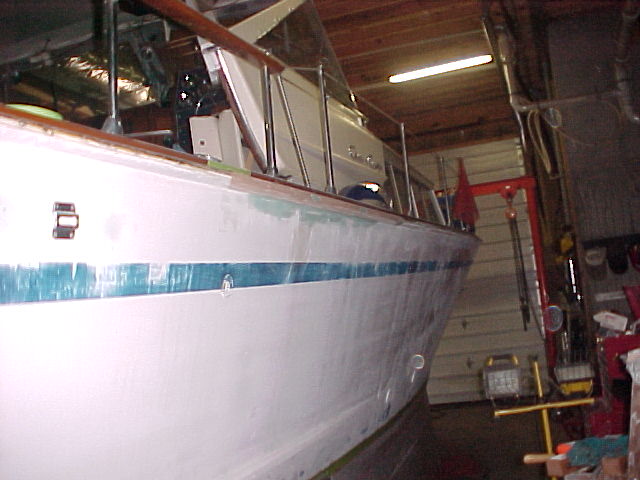
Where the hull meets the transom bow (structural member behind the surfaces pictured here) the existing screws will be tightened and / or additional screws will be added as there is some very minor water infiltration occurring at this joint.
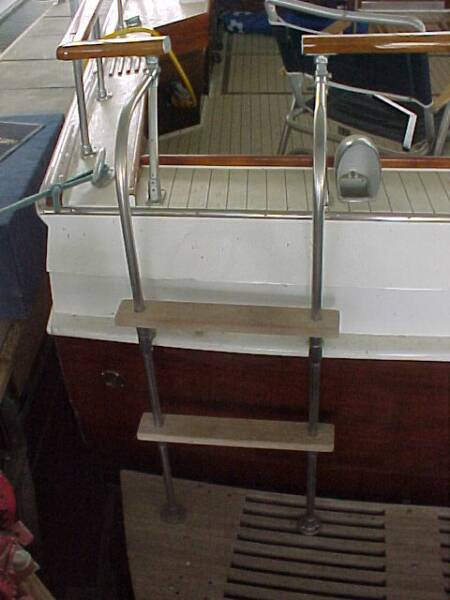
Also a new ladder from the swim platform to the cockpit is being considered that looks similar (but better) than the one in the picture to the right.

The original 327Fs have been converted to 350 cid engines using the original heads, manifolds, ignition, and carburation. The port engine will receive a tune up.
Update May 14th 2007
Work accomplished to date:
Area with cracked paint below spray rail stripped with chemical stripper - ready for sanding and priming.
All materials, primer, polyurethane paint, sand paper, caulk, varnish etc. on order and in transit to Woodies Restorations! Wood supplies already in stock at Woodies.
Battery Combiner solenoid switch
Troubleshot / repaired wiring to return solenoid to service
Battery Charger
Troubleshot battery charger - Good News it works! Only one of the three outputs on the charger was being utilized.
Tune up
Completed tune up by replacing the spark plugs in the port engine. Gap was checked / adjusted on all plugs. Plugs removed had improper gap. All plugs were torqued with a torque wrench to the proper torque as per Chris Craft Engine Manual.
Port and Starboard Rudder Packings
Packings were tightened 1/2 turn each. - Steering was checked for tightness during process. Packings are as tight as possible for reliable steering.
Trim Tabs
Trim Tab power unit was filled to proper level with Automatic transmission fluid. Owners manual was printed from Internet site for Boat Leveler Mfg. Co. and a technical service rep was contacted for possible additional help. Ultimately when the problem was found it was traced to a ground wire that had not been re-connected to the port engine battery, oh and by the way it was not easily identifiable as a ground wire as it was the wrong color! Trim tabs are fully operational on this 39 year old unit!
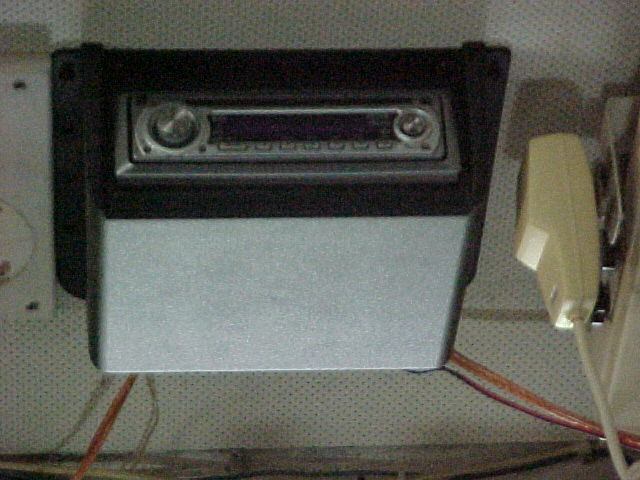
CD - hot wired to battery
While tracing wires for both the battery combiner and the trim tabs, a wire from the 8D battery to the cd player was found that had no fuse protection. This wire was shortened and re-terminated on a factory installed fuse protected terminal strip under the hard top of the boat.
Aft bilge pump hot wired to generator battery
While tracing wires for both the battery combiner and the trim tabs, a wire from the bilge pump switch on the side of the pilots console was found dangling. This led to the determination that the aft bilge pump was wired directly to the generator battery with no fuse protection. Bilge pump will be rewired to original control switch.
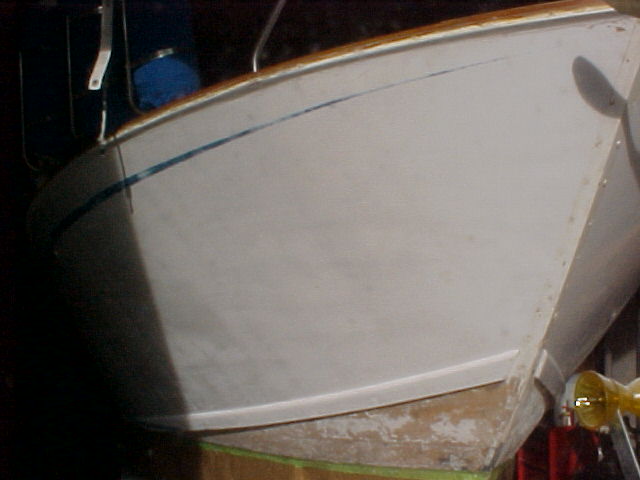
Noble Quest in shop - getting area below spray rail stripped of paint. This area took many applications of paint stripper. It had at least 5 layers of paint. We exposed the scribed mark on the hull that defined the original boot stripe location which turns out to be much different from the boot stripe that was on the boat when we got her. We are planning to go back to the original wide boot stripe in Chris Craft Blue.
See below for greater detail.
Note the original boot stripe scribe mark. It has a scribe mark placed in the hull by the factory. The scribe mark is defined in this photo by the Chris Craft Blue paint that remains in the scribe mark. See arrow ----
/\
/\

One important wire had broken at its crimp on terminal on one end. A short piece of new wire was run in its place and the combiner switch now works! Note the coil in the wire. This coil minimizes the effects of engine vibration on the stranded wire that broke the wire that was replaced.
/\
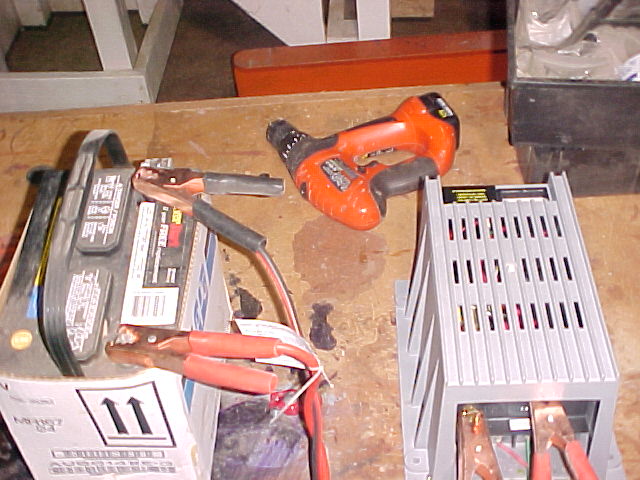
The battery charger is made for isolating and charging up to 3 battery banks. However only one battery charging terminal had been wired in. Woodies had a battery that needed charging and confirmed the operation of the charger. Two additional wires will be run from the other two unused terminals to their respective batteries.
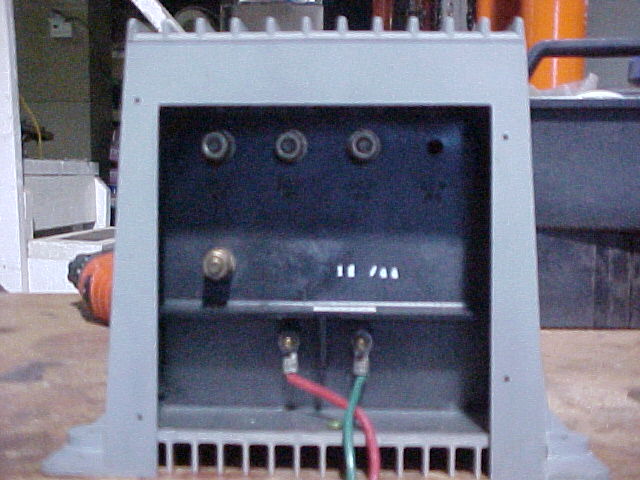
/\
The battery charger is made for isolating and charging up to 3 battery banks. However only one battery charging terminal had been wired in. The arrow indicates the only terminal being used of the three in that row for 3 battery banks. Woodies had to work with Guest to obtain an manual for this discontinued battery charger. The owner will get a copy of this manual to add to the compilation of owners manuals for the boat.

Pictured are the port and starboard rudder packings which were each tightened 1/2 turn. The steering effort was increased indicating the packings are as tight as they need to be. Also pictured is the 38 year old trim tab pump that still works!!!
Update May 25th 2007
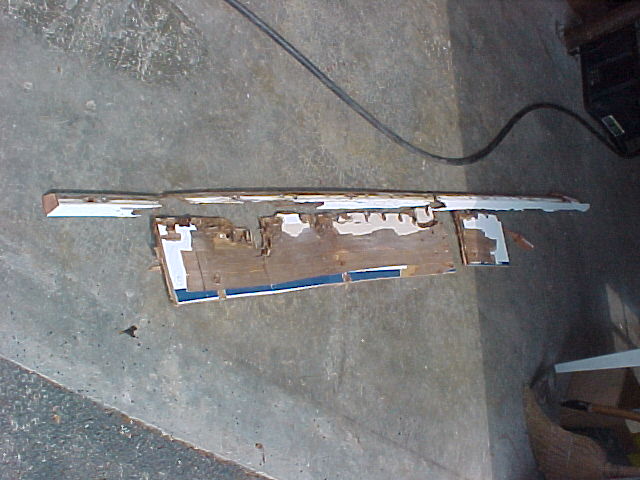

Rot was removed from the Port side near where the cabin attaches to the deck. There is some minor rot in the structural members exposed and this is in the process of being removed and the area treated with smiths CPES (Clear Penetrating Epoxy Sealer). The area removed is approximately 1-2 " wider than the visible rot - to ensure all rot spores (rot is a mold that eats the lignin in wood) have been removed. Special care is being taken to ensure the removed wood / rot does not fall into the hull. In addition the hull will be vacuumed and rinsed with a borate solution before it is launched.
Note the prior repair that was made with bondo. Part of the rub rail has also been replaced before. The rub rail is cut back further than the area of the hull to get to an original joint in the rub rail, thereby keeping the replacement from looking like one!
The area cut out 6" wide by 54" - just a little over the 2 square feet estimated.
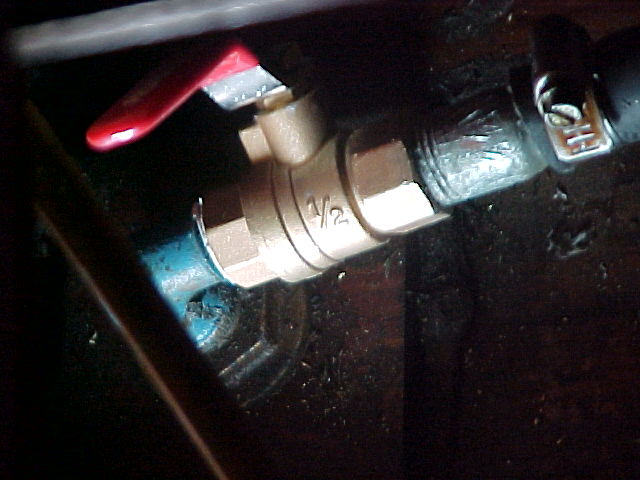
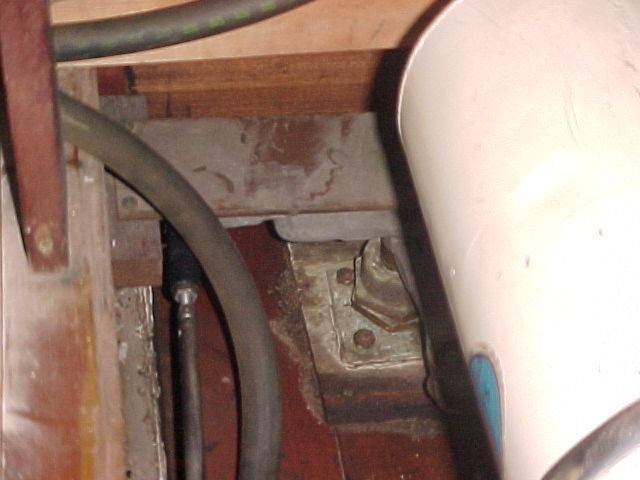
A gate valve that provides lake water to the head for flushing AND water to the generator was replaced with a ball cock. What a tight spot!

The battery charger, which was thought to be faulty was found to be fully operational but improperly wired during the previous update period.
For example - this is a 3 battery bank charger, however, only 1 output ( 1 bank) was being used.
Since the previous update, all three banks ( Port engine, Starboard engine, and Generator) have been wired to separate outputs. The charge indicator started off showing a little over 20 amps and as the batteries have become charged the load dropped down to the 8 amp load shown on the charger meter.

While repairing the bilge pump wiring ( bilge pump found hot wired to battery) it was observed that there was no hose clamp on the bilge pump connection, so a hose clamp was added.
/\

The battery hold down strap was replaced for the generator battery as the clasp was broken on the original strap.
GENERATOR
Good news, bad news, good news!
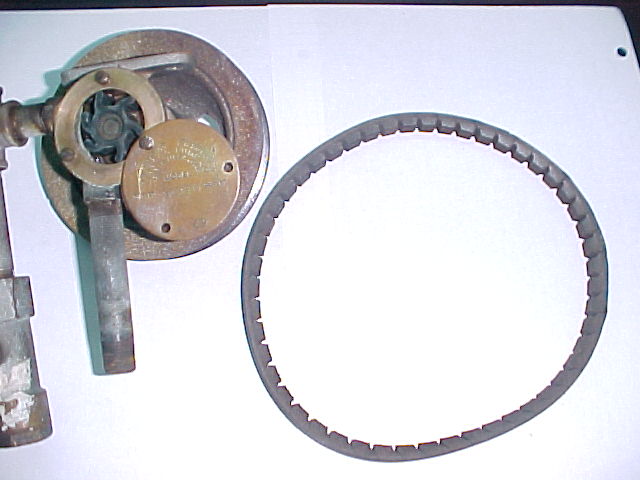
The generator starts and runs about 15 minutes, then after being off 15 to 20 minutes starts back and runs a few minutes and then shuts off again. This sounded like poor cooling as the generator being an unattended engine ( unlike the boats engines for movement) has a couple of safety devices on it. One such device is the HI temperature cut off. If the generator engine is not cooling properly, the high temp cut off will shut the engine off to
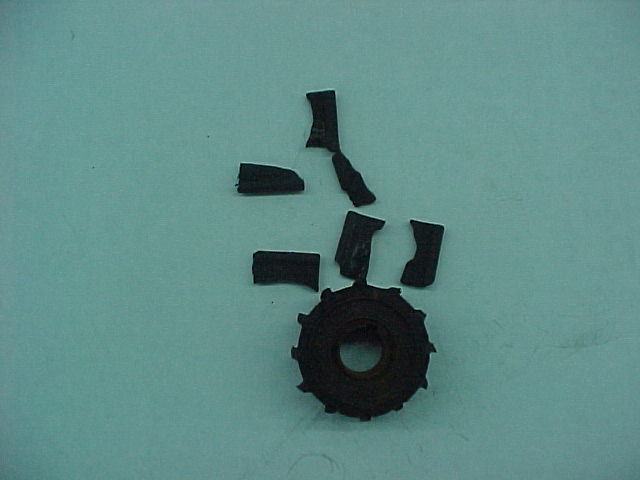
keep from damaging the engine. So the water pump impeller was the likely candidate for being the problem. The bad news.... the impeller (shown above) is OK unlike the EXAMPLE in the photo to the right.
In the EXAMPLE picture the impeller has disintegrated and the pieces lodged themselves into several places in the engine thereby reducing water flow and hence cooling. This is a good reason to change these impellers every couple of years at a minimum to avoid having these come apart.
That is bad news, because we have to keep looking for the root cause of the problem. But it is good news because the impeller is not in a quintillion little pieces in the engine... or is it.... We will do a quick back flush of the cooling passageways to ensure the impeller BEFORE this one isn't in a quintillion little pieces. We put a strainer in the water flow to catch any pieces - if we do we just keep flushing until more come out. If none come out - we keep looking for root cause.
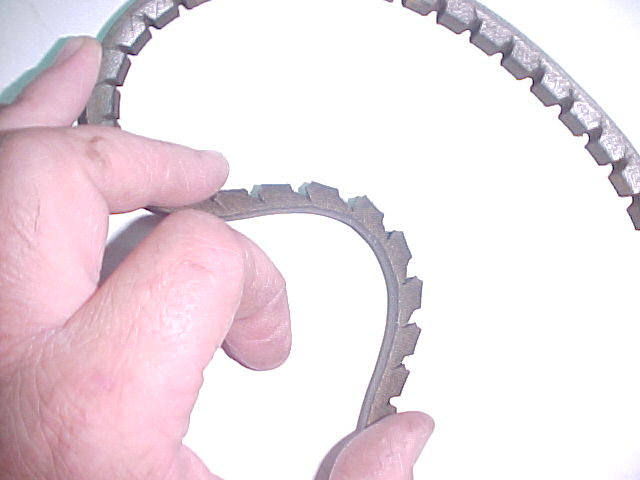
More Good News! We may have found the problem in the drive belt for the water pump. It is glazed which indicates slippage and it is also dried out and will completely fail soon. We will be replacing this, along with the impeller.
/\
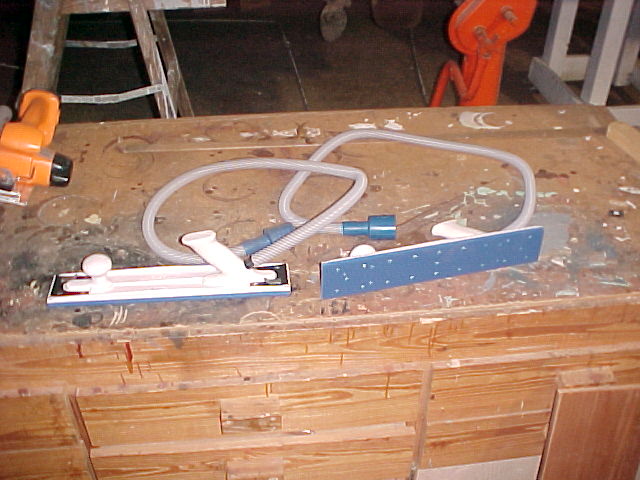
HULL SANDERS
Along with the primer, paint and other supplies that came in this week came our new dust free vacuum / long line sanders. These will minimize the amount of dust in the shop and ultimately in the cabin and cockpit of the boat when the hull is sanded. This will reduce the time required to clean the boat after the work is done. The long flexible sanders will ensure a slick glossy finish on the boat. The sandpaper used on these long boards gets pierced to let air and dust flow through them to our shop vacs.
NEXT WEEK
Promises to be a busy one with the closure of the hull on the port side (which we wanted to get done this week) hull sanding, priming, painting. We will also be dealing with the area atop the refrigerator, and the deck. We have been barraged with samples for the bow deck vinyl and have a suitable replacement found, so that will also be ordered next week and should be in prior to the competition of the wood replacement. Lastly... all other customers (added) work will be complete and this boat will be our ONLY concern next week. Feel free to call and / or visit!
ITEMS ADDED TO SCOPE: on June 4th 2007
Check Cabin convenience lighting - replace bulbs where required
Gas refrigerator with R12 gas
Price Ladder for transom
Purchase and install battery box for 8D battery
Delivery Date June 30 or before.
Update June 8th 2007

See photos above.
In the area on the port side where the rotted portion of hull was removed early on in this process some rot was found in the structure behind the hull sides. All that rot was thought to have been ALL cut away and replaced with new wood.
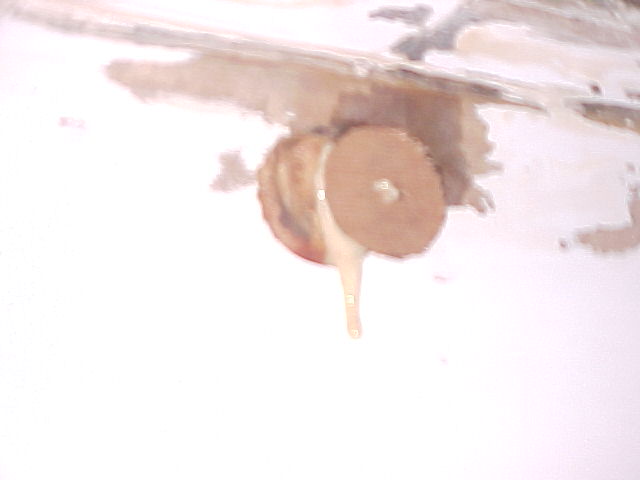
This week, as a last step before replacing the hull side, screw holes where rot had "tracked" along screw holes were being treated. We treat these by enlarging the screw holes with a twist drill and then driving and gluing a dowel rod in the hole. In this way we remove all rot and fill all pockets where water could accumulate In order to prevent / retard growth of rot. In this process we discovered a HUGE pocket of rotted material under the surface.
Huge is a matter of perspective of course. When you think you are going to drill a 3/8' diameter hole about an inch deep and remove all the rot , and you find that just under the surface there is an area 12 inches long and about 3" deep that is all rotted then the area of rot is huge. In fact, in the grand scheme of things on a 33 foot boat this isn't all that bad! BUT! It has to come out, or it will infect the new wood and the rot re-appear prematurely.
Pictured at left is the rot that crumbled out of the "cavity" we opened. The center photo shows the affected area, and the photo to the right shows where we have bonded in new structure with 3M 5200 adhesive and screws. NOW we are confident we have removed ALL the rot in this area of the port side of the cruiser and it will be safe to replace the hull side with new wood. This repair should last 10 years or more.
Surprise Rot!
During the hull sanding process in preparation for paint we found a small area where the top two or three layers of the marine plywood had deteriorated with rot and had been filled previously with some type of bondo product. The area was drilled with a forstner bit to remove the rotted material. Fortunately, only the outer layers were affected. A single part polyurethane glue was used to secure 4MM thick BS1088 certified Marine Plywood plugs in the area. This repair is minor and is being adsorbed in the cost of preparing the hull for painting.
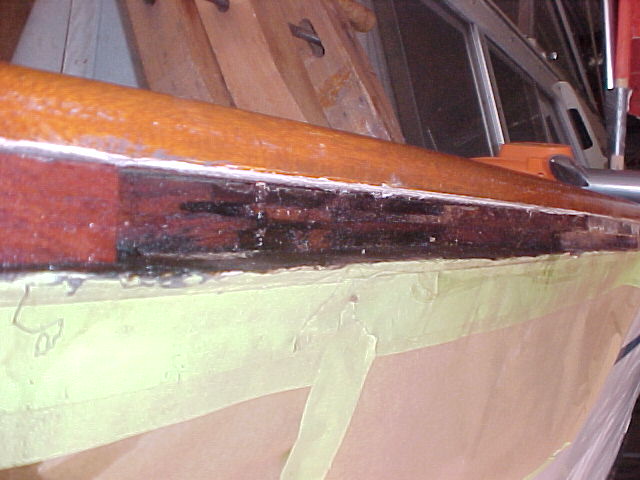
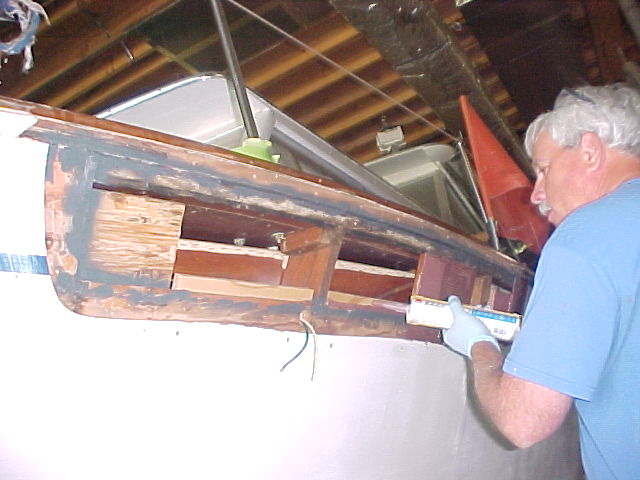
The last (Hopefully ) of the Surprise rot was located on the Starboard side. An ice pick marks the rot in the photo. All rot appears to be in the rub rail wood known as the coaming. This will be an easy fix - unless the rot has migrated to the plywood below as it had on the port side. The odds are with us as rot does not migrate past well painted surfaces, glue in glue joints, caulk etc. Also, in probing the plywood surface just below the coaming there may be some rot in the surface layers of the plywood but not all the way through as was the case on the port side.
A general comment on the Surprise rot - My accountant is currently determining whether or not the cost of this surprise will be adsorbed in the original estimate, or if this will run us over the hours allotted for this portion of the job. It is our sincere desire that the repair cost for this area will not exceed the estimate for this area.
The hull sides have been sanded with 80 grit paper to remove all loose paint and create a mechanical bond for the paint to adhere. Also during this process every square inch of the hull is inspected for scratches, punctures, rot ( rot found in 3 places ) .
One concern was for all the cracks in the paint - similar to those under the spray rail at the bow of the boat. When sanding we found we could sand out these cracks and the paint surrounding these was tightly bonded to the layer of paint below. These cracks that can be found over the surface of the entire hull - although not NEARLY to the extent they are found below the spray rail, are requiring some extra effort during the sanding process. We hope to adsorb this effort in the time allotted for the hull painting job. We are on track to apply the primer coat of paint on Monday June 11. We suspect that the previous paint job was an automotive paint, or an epoxy that has cured hard and is not as flexible as the marine polyurethane that will go back on the boat.
Painting

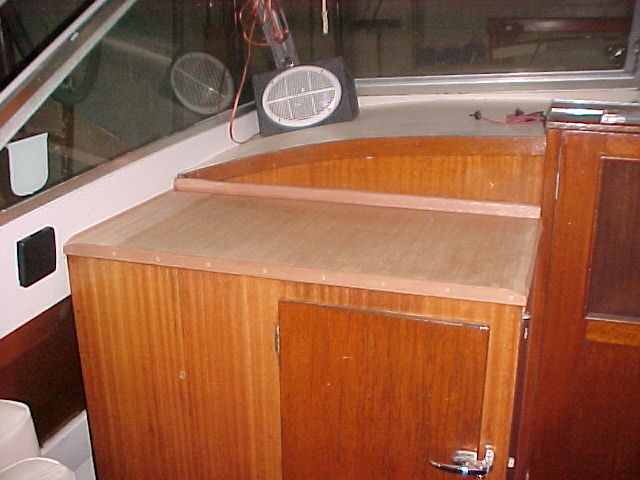
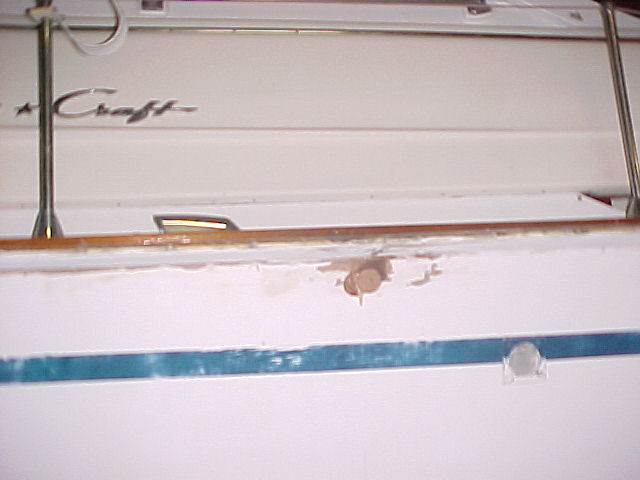
The refrigerator top has been removed, the rot removed and new wood biscuit jointed to the top on the left side. When the varnish was removed from the original wood, we found some wood that was discolored (gray) due to water infiltration under the varnish. The top will be bleached with a two part bleach to remove the discoloration. Rot was also found in the end of the wood used to attach the refrigerator box to the wall - (just above arrow in picture) - and a trim piece between the top and windshield frame - this wood was replaced as well.
/\
/\
/\
/\
/\
/\
The area where the plywood is to be replaced is being "buttered" with 3M 5200 which I call 52,000,000 since it is such great stuff!! 3M 5200 is a adhesive sealant that is so tenacious when two pieces of wood are bonded together with it the joint is stronger than the wood. The wood will break before the joint comes apart. We have routed the edge of the existing plywood and the edge of the new piece so to produce a lap joint and essentially re-manufacture the original plywood for the hull in place on the boat!. In addition, the seams have been backed with 3/4" plywood seam battens. After the plywood goes in place and is fastened in, the rubrail will be fabricated and installed, then a skim coat of polyester filler will be applied to hide any seams that might otherwise show. Note the wavy or "serpentine" cut at the bottom of the opening. This is so if there were any telltale sign of a seam the eye can not follow it and it would not be easily detected.
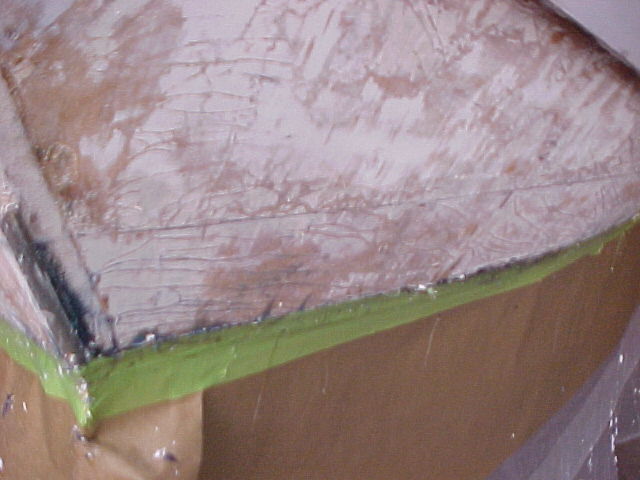
Plywood and rubrail replaced, and skim coat applied. The hull is completely sanded, and masked off for painting. The first coat will be a primer coat that will be applied. The primer coat has a great deal of solids in it and is made to sand again to make the surface as smooth as possible. There were a number of cracks in the original paint surface that were similar to those found under the spray rail. Those cracks were treated by sanding and chipping all loose paint off, then filling the bare areas with polyester filler and sanding. These cracks were located randomly all over the side of the hull.
Note the area between the green tape lines shown by the arrows.- this is the proper boot stripe location and size.
/\
\/
Update June 17th 2007

The red line shown in this photo is generated by a laser. The boot stripe lines were scribed on the boats in the factory. The scribe marks left a small groove in the hull. Years of paint application and sanding made these grooves disappear. When we sanded and especially in the area under the spray rail where we stripped the finish we found portions of the grooves still intact. Using these exposed grooves / scribe marks, we set up our laser to intersect the scribe marks where they appeared near the bow and stern of the boat. We then used the laser line as a guide to apply tape so that the new boot stripe would be in exactly the same position as the one the factory applied in 1968!
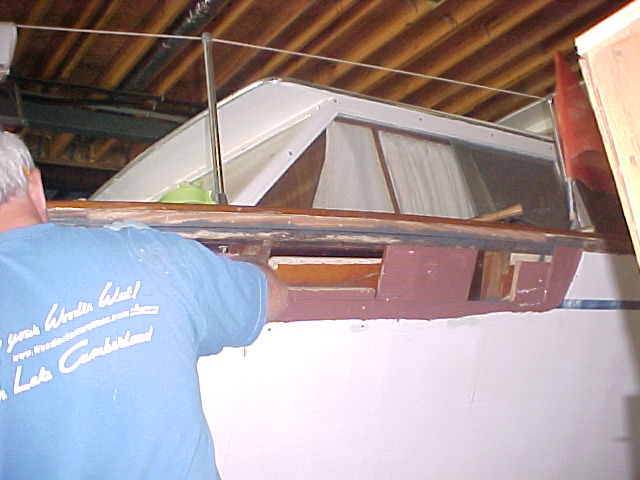
As shown in the previous update, we found rot in the rub rail on the Starboard Side (photo 1)while sanding in preparation for the painting of the hull. There were actually two spots approximately 3 feet apart and approximately 1 foot long that exhibited rot. Approximately 5 feet of rub rail was removed and the plywood underneath checked for rot. Finding no rot in the plywood the entire area underneath the rub rail was treated with Smiths CPES (clear penetrating epoxy sealer), (see photo 3). Photo 4 shows new rub rail in place, screw holes bunged and ready for painting, staining and varnishing.
Also completed this week was the first sanding of the hull. This is a time consuming process as we hand sand with a flexible "long board" to achieve a smooth surface for the new paint to be applied. Subsequent sandings (after the primer coat and first finish coat) will take less time due to the care taken during the first sanding.
The primer coat goes on the boat tomorrow - while it is drying a number of other scope items will be addressed such as cabin lighting, refrigerator etc..
Photo 1
Photo 2
Photo 3
Photo 4
The deck rot under the vinyl should also begin tomorrow... the material vinyl material received one week ago Friday did not match the sample used for selection. It was much darker. Last week the supplier checked both its Cincinnati and North Carolina warehouses for the proper material, and also checked with the manufacturer to find material that matched their samples to no avail. Another round of samples was sent last Friday of exactly what is available in the warehouse in Cincinnati. These samples are expected in the mail on Monday June 18th. When these arrive a new selection will be made and the material will be only a few days away - and at this time the deck will be opened up!
Update June 19th 2007
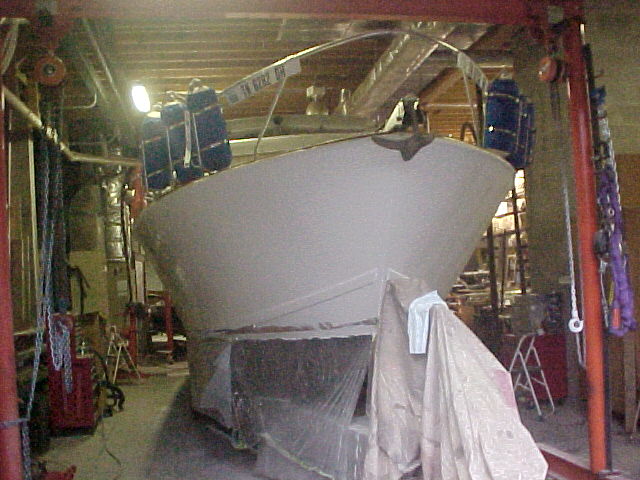
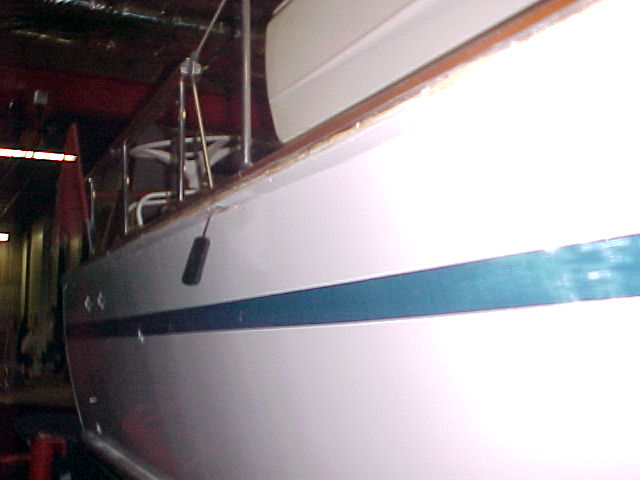
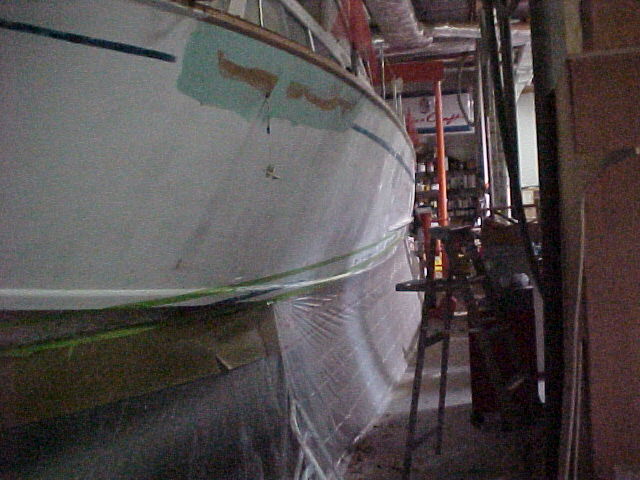
Two coats of primer were used instead of one as there was some blue boot stripe, some black bottom paint and some blue accent stripe that had to be covered as they were in the wrong place. The primer goes on glossy (as you can see the reflection of some orange items in the photo) but dries flat. It is easily sanded and helps to "fair out" any irregularities in the surface, by filling the low spots in. When we block sand the low spots don't get as much material taken off as the high spots and hence the hull becomes very smooth.
Tomorrow the new vinyl is supposed to arrive so work will begin on the deck (FINALLY). We will be sanding once again and applying the first coat of high gloss Briteside Polyurethane also.
Update June 25th 2007

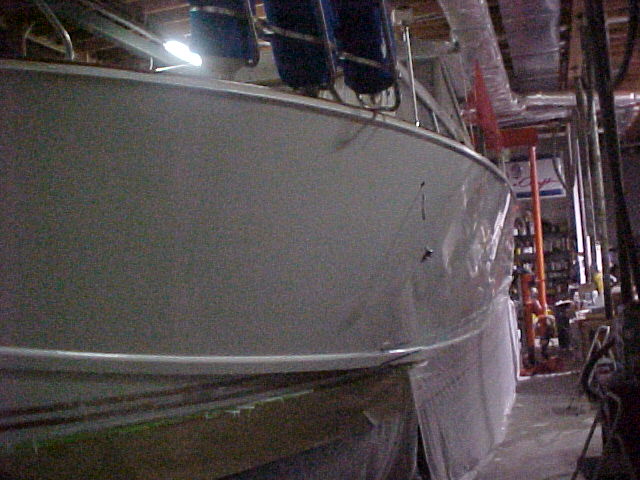
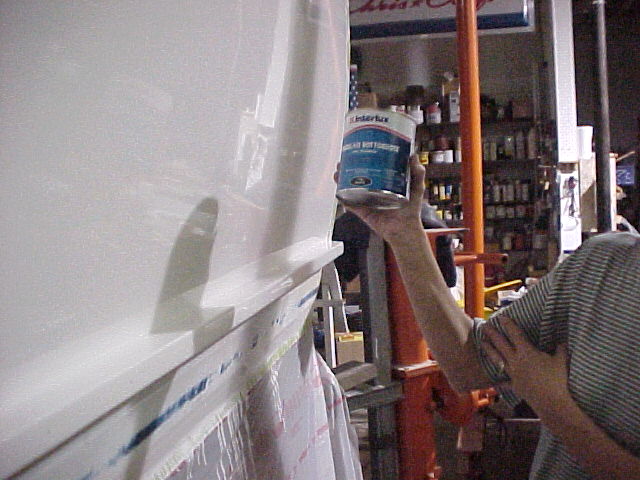
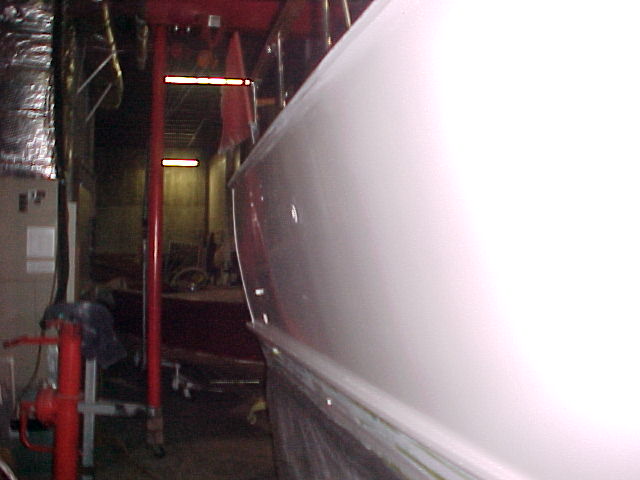
After the first of two finish coats was applied we discovered it STILL didn't cover the blue trim stripe. So we added two more coats of primer over the stripe and sanded it fair. We now have 2 finish coats on as per the mfgs recommendation. The port side has 3 coats as we were not satified with the finish on the second coat and aborted the painting process that evening. The polyurethane with teflon is a new product to us so we did some experimenting on how best to apply it to achieve the finish we are used to with the product we normaly use. The results are stunning. In the pictures below:
- upper left - note the reflection of the orange gantry crane in the side of the hull.
- Upper right - note that the repair made to the port side of the hull is absolutly invisible!
- Lower Left - note the reflection of the paint can my lovely assistant is holding!
The good guys are winning!!!
Other good things that are happening include the boarding ladder. Note the steps aren't in place but the uprights are in place and now the steps and step strips for on top of the vinyl will be made.
The last great thing is the water pump for the generator has been rebuilt, a new thru hull fitting installed and the generator has been tested and is ready for trouble free operation. The cooling water leaving with the exhaust is 120 degrees and is quite comfortable to the touch. Like a nice warm shower! The generator was run for 15 minutes today while puming it's own water from a bucket in the boat. It consumes about 1 gallon of water per minute for cooling of the engine.
The Home Team The Meanies
Port Engine tune up One dead refrigeration compressor
Battery charger
Trim tabs
Battery combiner solenoid
Refrigerator top
Paint job
Port side Rot repair
Sea cock for the head (ball valve)
Some misc items - bilge pump
- CD player
- cabin lights
- tightened rudder packings
Other good things that are happening include the boarding ladder. Note the steps aren't in place but the uprights are in place and now the steps and step strips for on top of the vinyl will be made.
The last great thing is the water pump for the generator has been rebuilt, a new thru hull fitting installed and the generator has been tested and is ready for trouble free operation. The cooling water leaving with the exhaust was measured with a thermometer and is 120 degrees and is quite comfortable to the touch. Like a nice warm shower! The generator was run for 15 minutes today while puming it's own water from a bucket in the boat. It consumes about 1 gallon of water per minute for cooling of the engine.
Update July 4th 2007
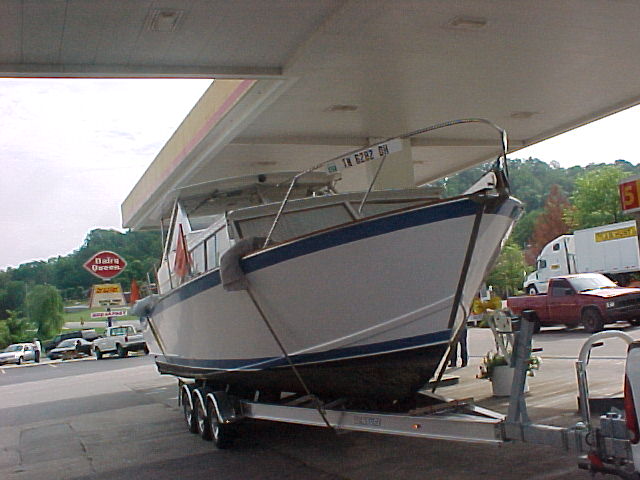
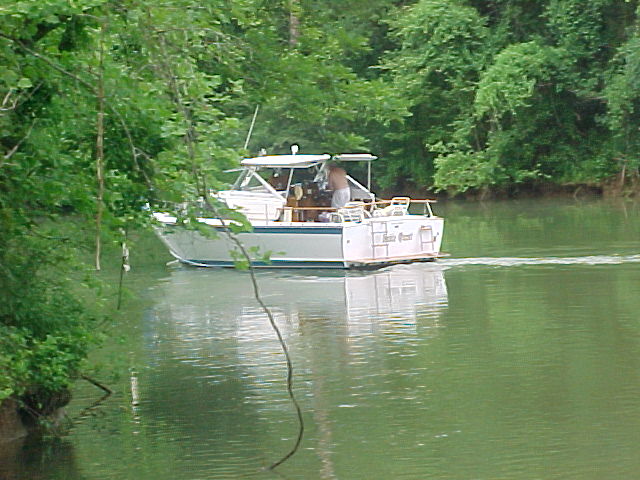
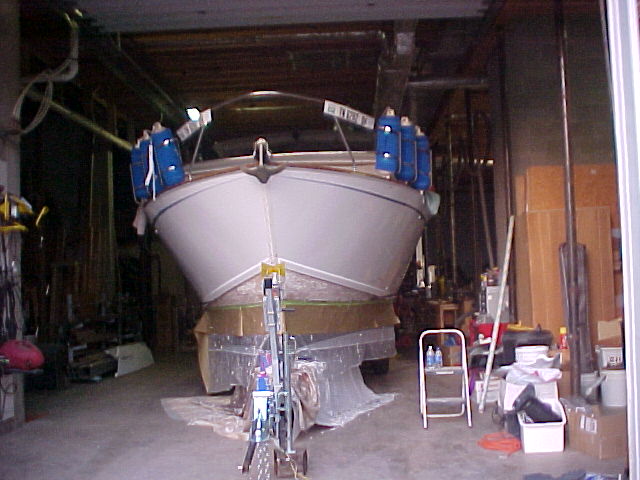
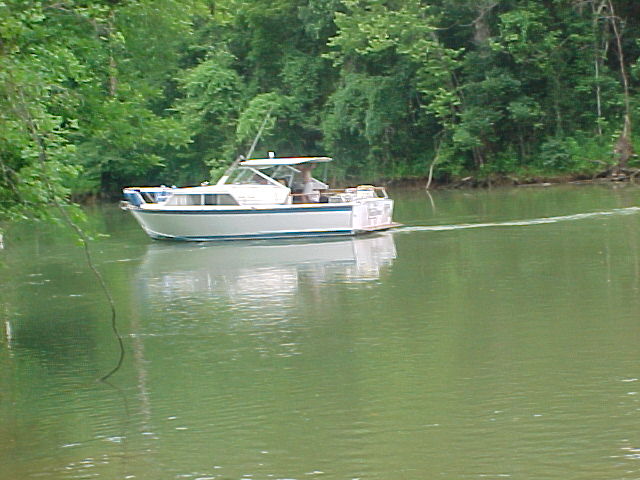
Pictured below the Noble Quest is getting fueled up and water tanks filled for a 2 day 125 mile river trip down the Cumberland River from Celina Tennessee to Rome Tennessee. The trip was a great sucess and a lot of fun for the owner. The boat was again loaded at Rome Ferry near Rome TN and transported to Percy Priest Lake where it currently resides in its covered slip.
She is looking proud with new paint, varnish on the brightwork and all systems operational.
270-866-2628 [email protected]
New Toll Free Phone Number 866-921-2628